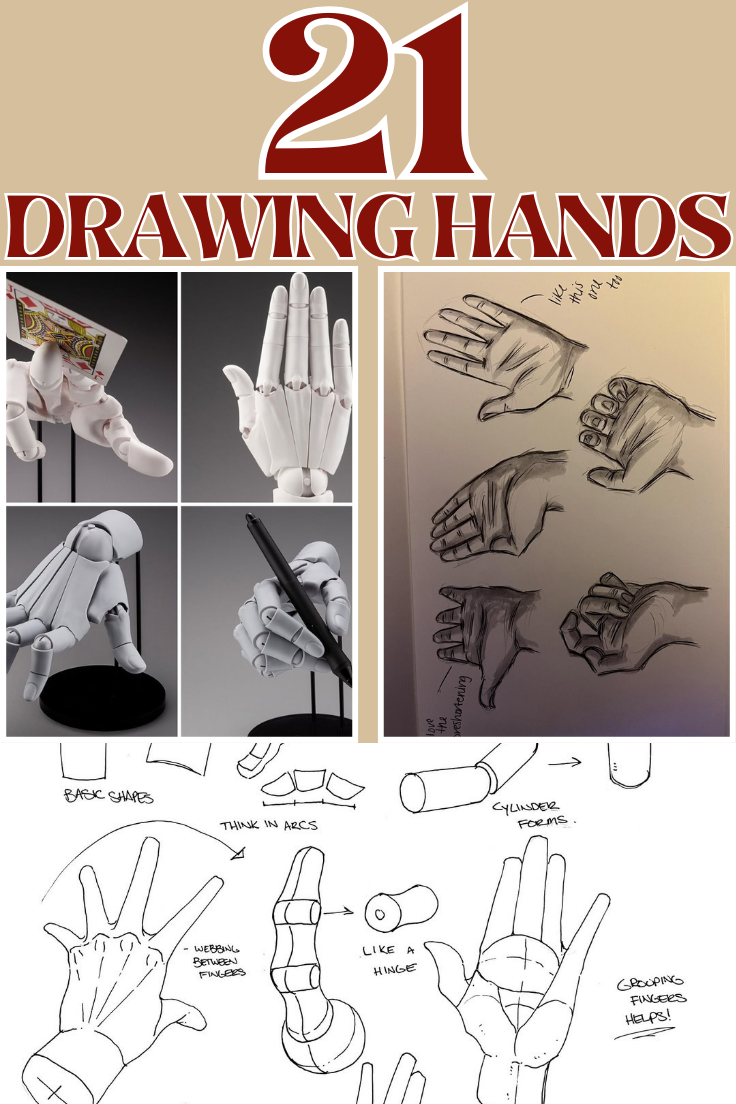
Drawing hands is one of the most challenging aspects of art, yet mastering this skill can set an artist apart, elevating their work with lifelike gestures and expressive details. Hands are complex structures made up of 27 bones, intricate muscle formations, and an incredible range of movement. Whether open or clenched, resting or in motion, hands play a crucial role in conveying emotion and storytelling in art. However, many artists struggle with drawing hands due to their flexibility and ever-changing shape, leading to disproportionate fingers, stiff postures, or awkward angles. The good news is that understanding the fundamental techniques and following a structured approach can make drawing hands significantly easier. In this guide, we’ll uncover 21 secrets every artist should know to confidently draw hands with accuracy and fluidity. From breaking down complex structures into simple shapes to understanding proportions, foreshortening, and shading techniques, these insights will transform how you approach drawing hands, making the process less intimidating and more enjoyable. Whether you’re a beginner looking to improve or a seasoned artist aiming to refine your skills, these practical tips will help you master one of the most essential elements of figure drawing.
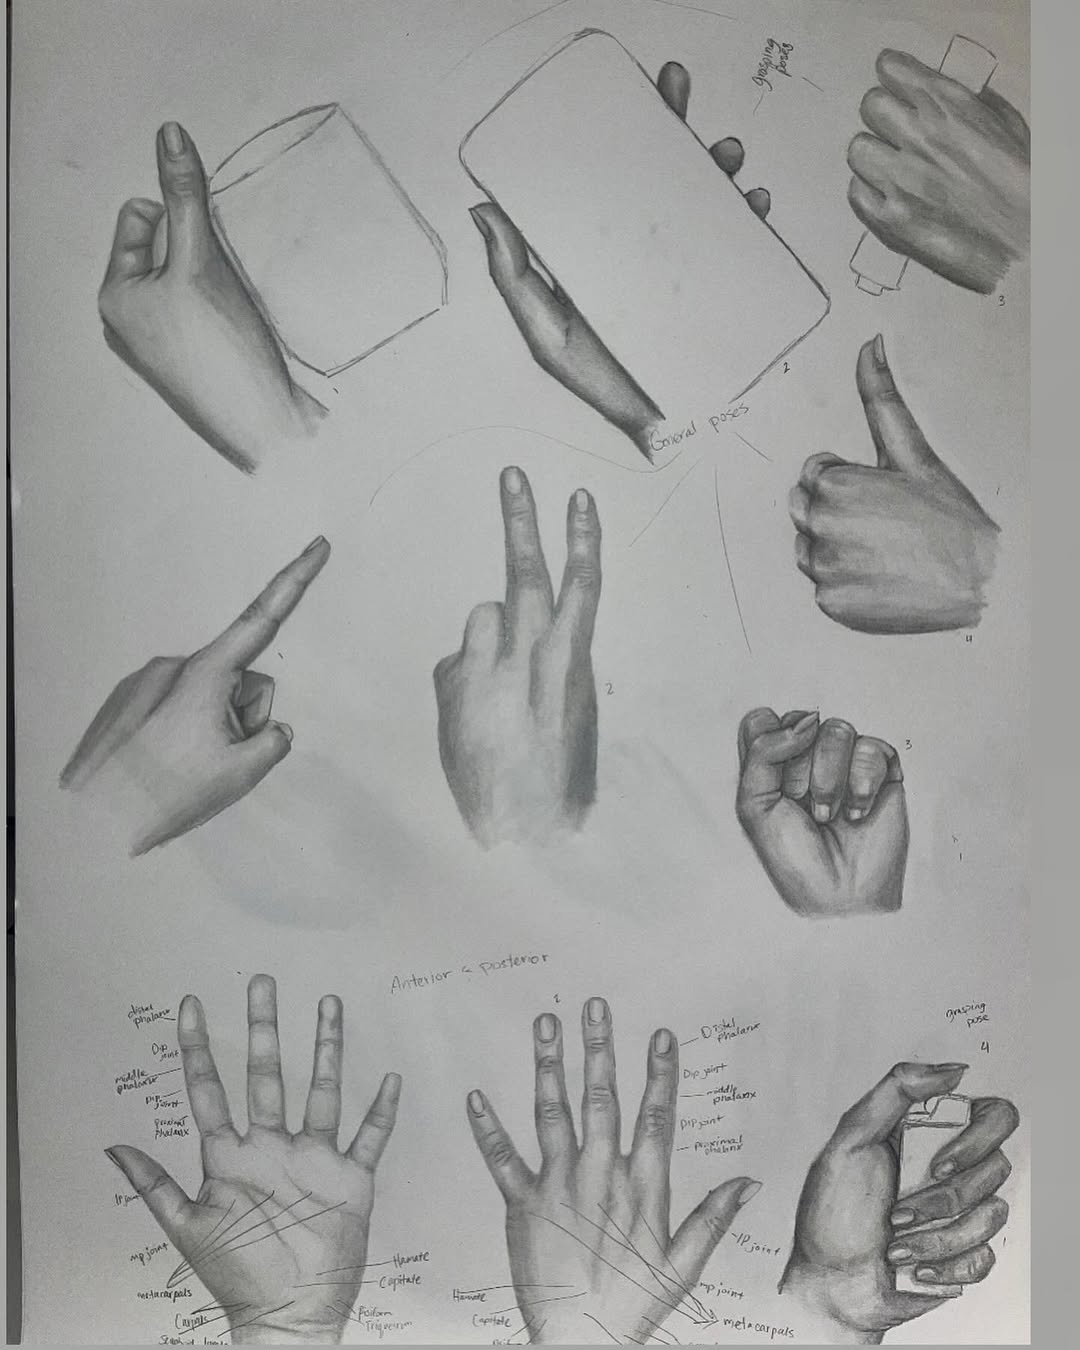
1. Understand the Basic Structure of Hands
source @brianknoxart
Before diving into detailed drawings, it’s crucial to understand the anatomy of hands. The skeletal structure consists of the carpal bones in the wrist, metacarpals in the palm, and phalanges forming the fingers. Each finger is made up of three joints (except the thumb, which has two), allowing for a wide range of motion. The hand is not just a collection of fingers; it works as a cohesive unit where every movement affects the other parts. Studying anatomy books, examining your own hands, and using anatomical reference models can be incredibly beneficial in understanding how bones, muscles, and tendons shape the hand. Rather than memorizing every detail, focus on the essential landmarks, such as the knuckles, the pad of the palm, and the natural curve of the fingers.
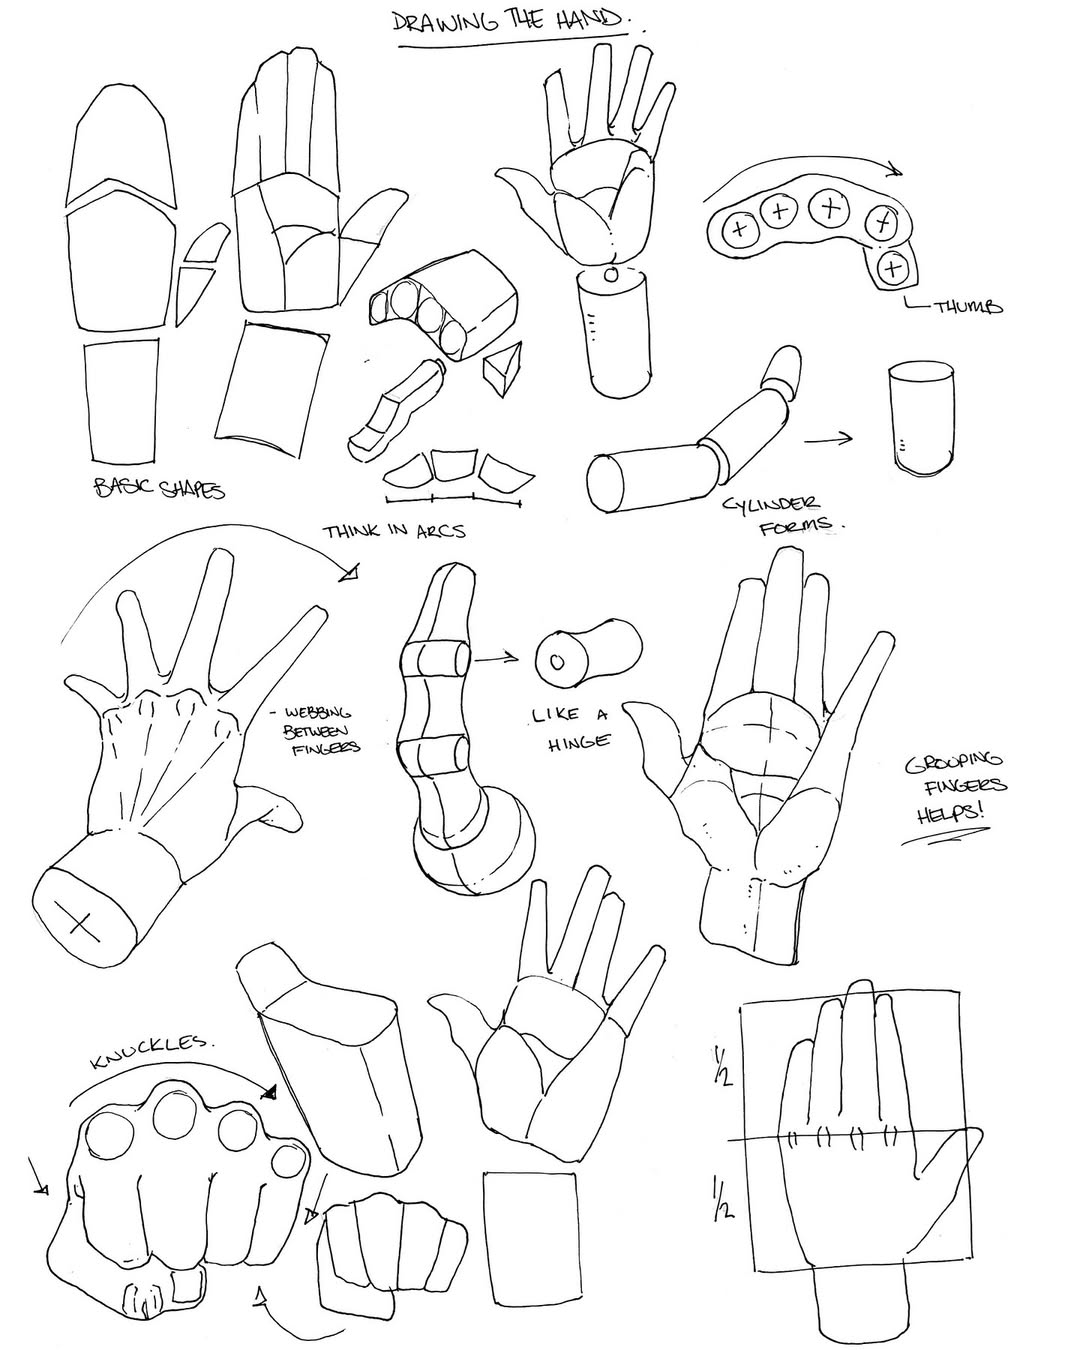
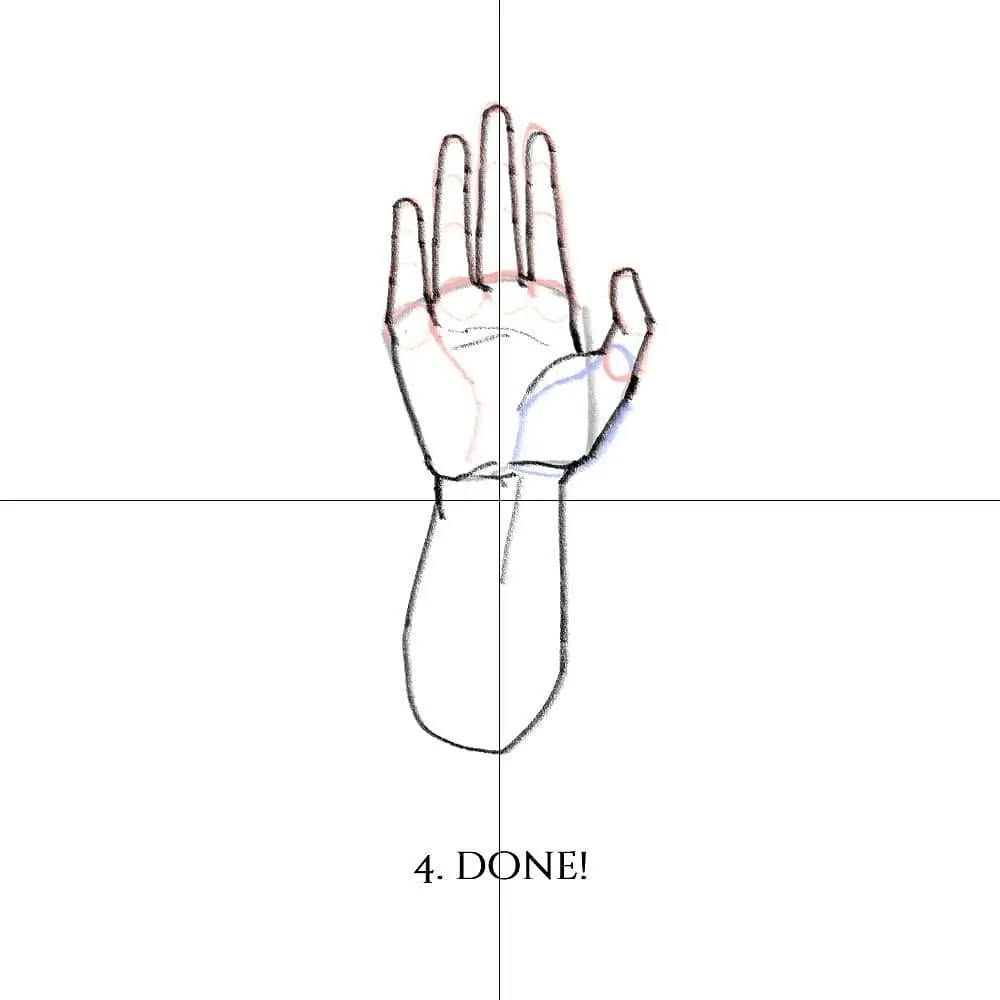
2. Break the Hand into Simple Shapes
source @dream2draw
One of the most effective ways to draw hands is by simplifying them into basic geometric forms. The palm can be visualized as a rectangular box, the fingers as elongated cylinders, and the thumb as a cone-like shape with more freedom of movement. Breaking down complex forms into simpler structures makes it easier to maintain correct proportions and angles. This method also helps prevent common mistakes, such as making fingers too long or positioning them unnaturally. Once the basic structure is established, you can refine the details, ensuring a natural and balanced hand shape.
3. Use a Posable Hand Model for Reference
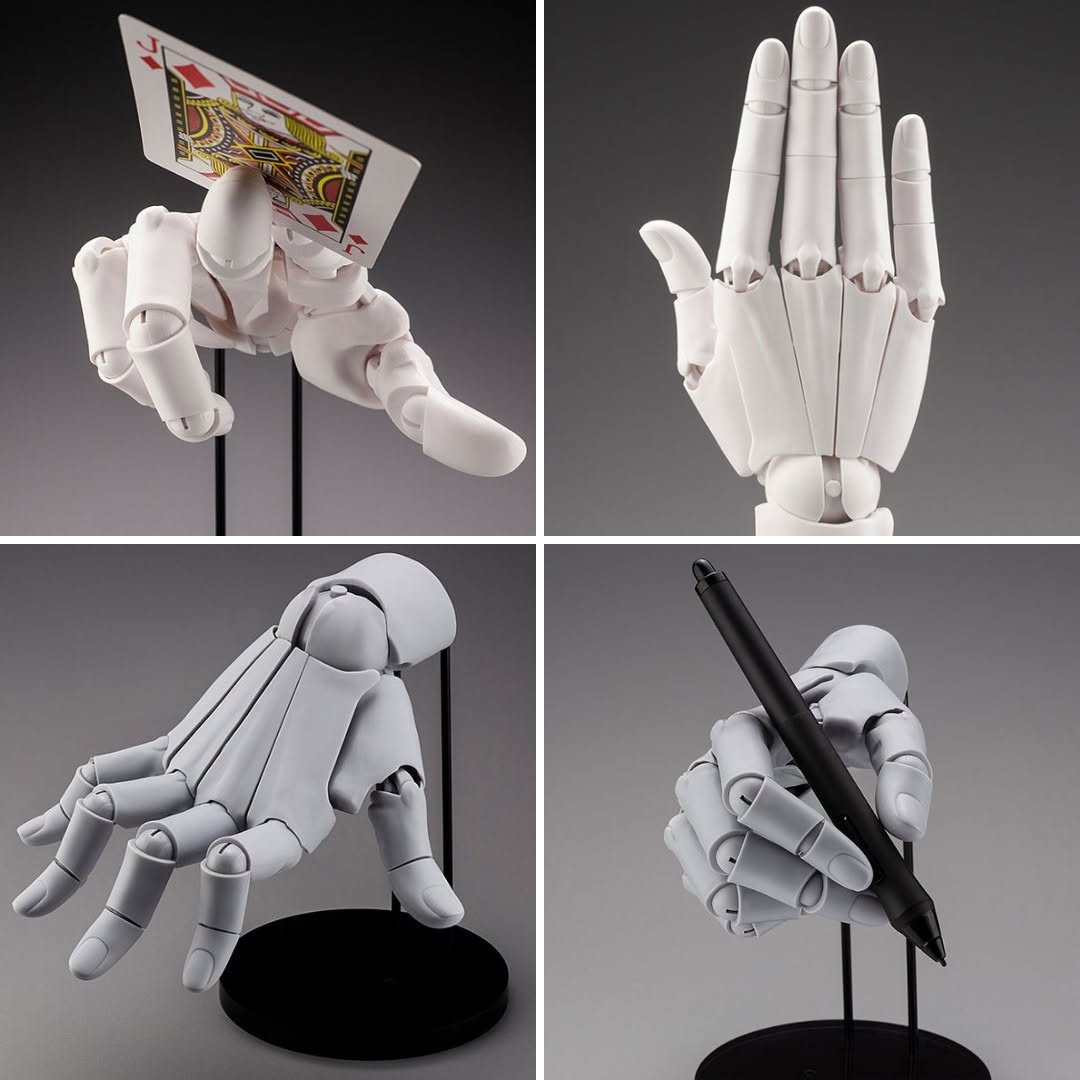
source @hobbylink.japan
Hands are incredibly dynamic, constantly changing shape based on movement and perspective. Relying solely on memory often leads to inaccurate results. A posable wooden hand model or a digital 3D reference app allows you to study how fingers bend, how the palm shifts, and how foreshortening affects the appearance of the hand. Unlike flat reference images, 3D models let you manipulate the hand into different poses, giving you full control over angles and gestures. This tool is especially useful for understanding how light interacts with the hand’s structure, casting shadows that enhance depth and realism.
4. Master the Proportions of Fingers and Palm
source @inkstructor
Correct proportions are crucial for drawing hands accurately. A general rule of thumb is that the length of the palm is roughly equal to the length of the middle finger. The index and ring fingers are usually similar in length, while the pinky is noticeably shorter. When drawing, it’s helpful to measure proportions using guidelines or comparing parts of the hand to each other. Hands that are too long, too short, or disproportionate can look unnatural, so constantly check measurements as you sketch.
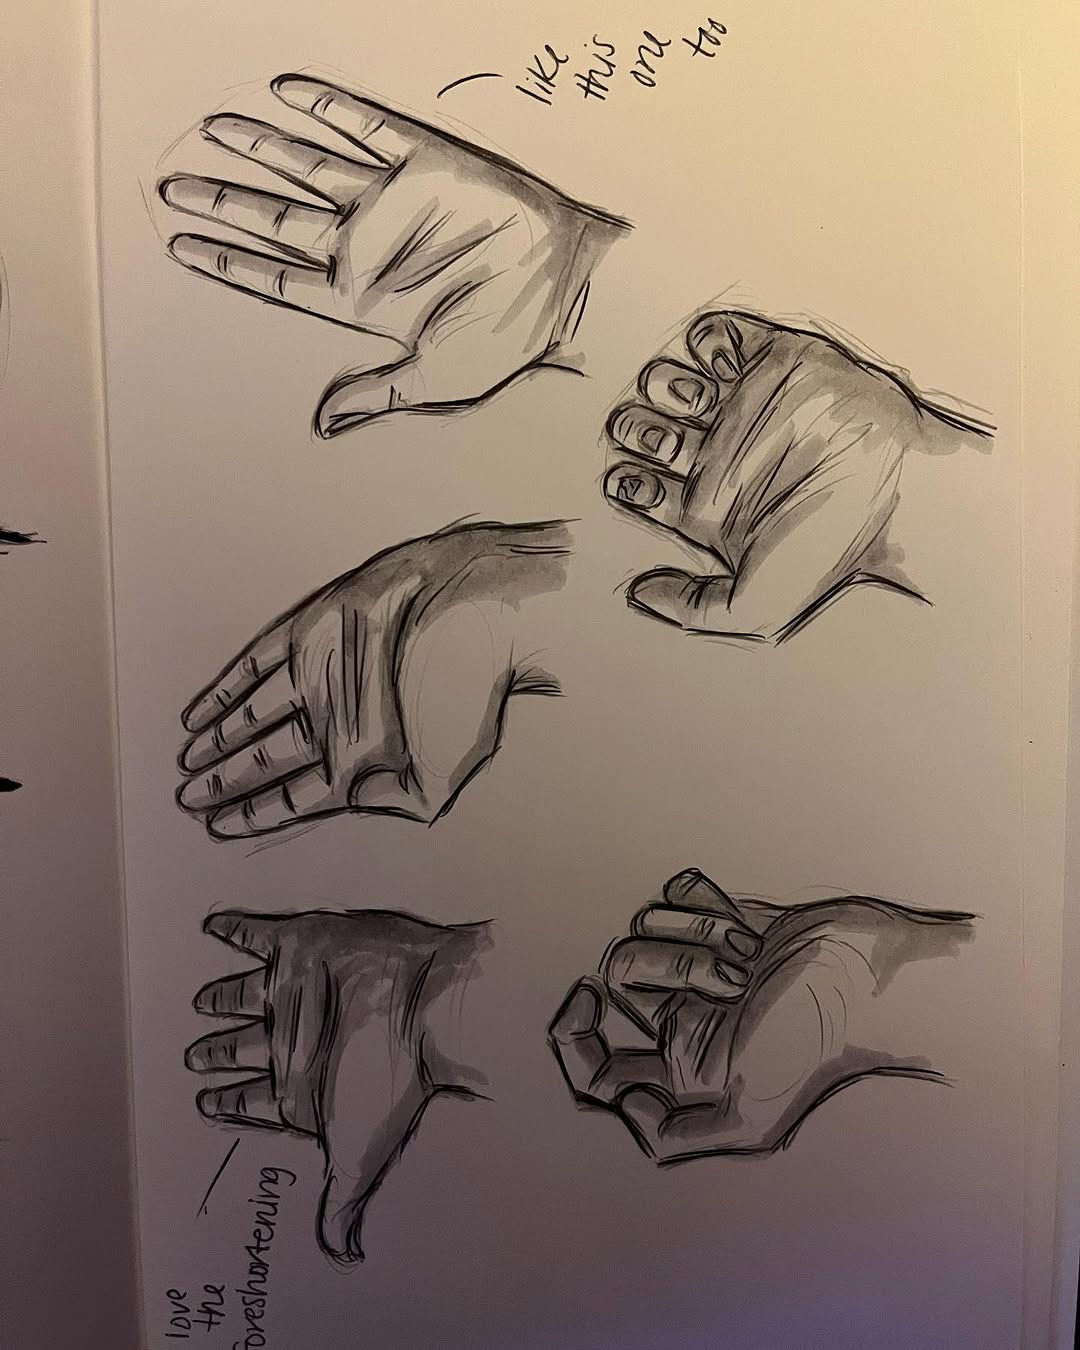
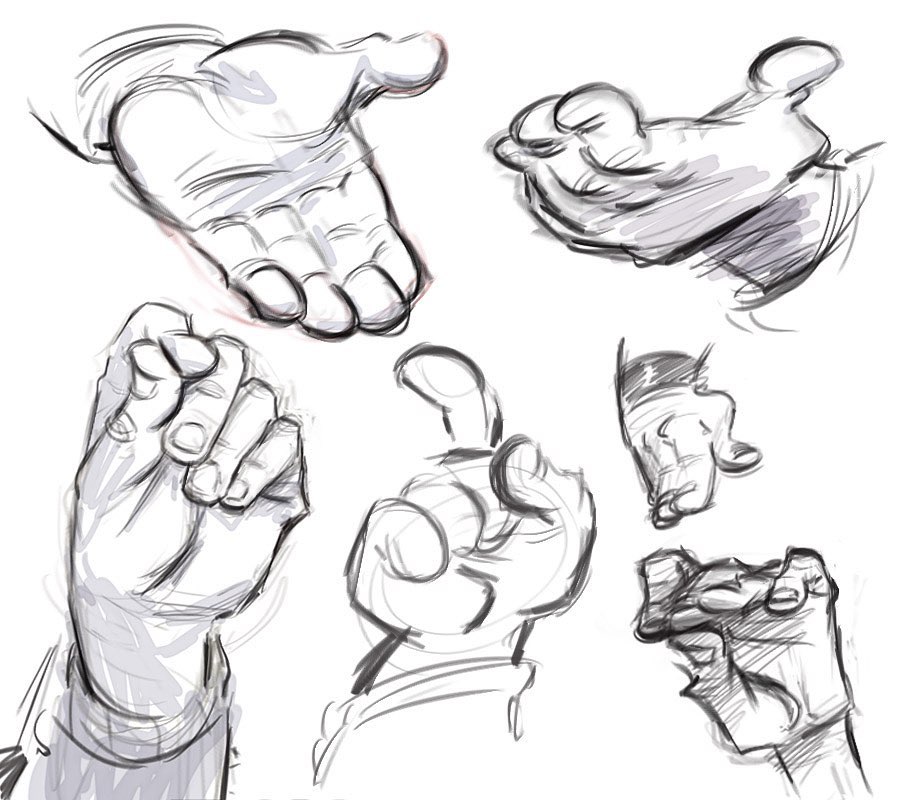
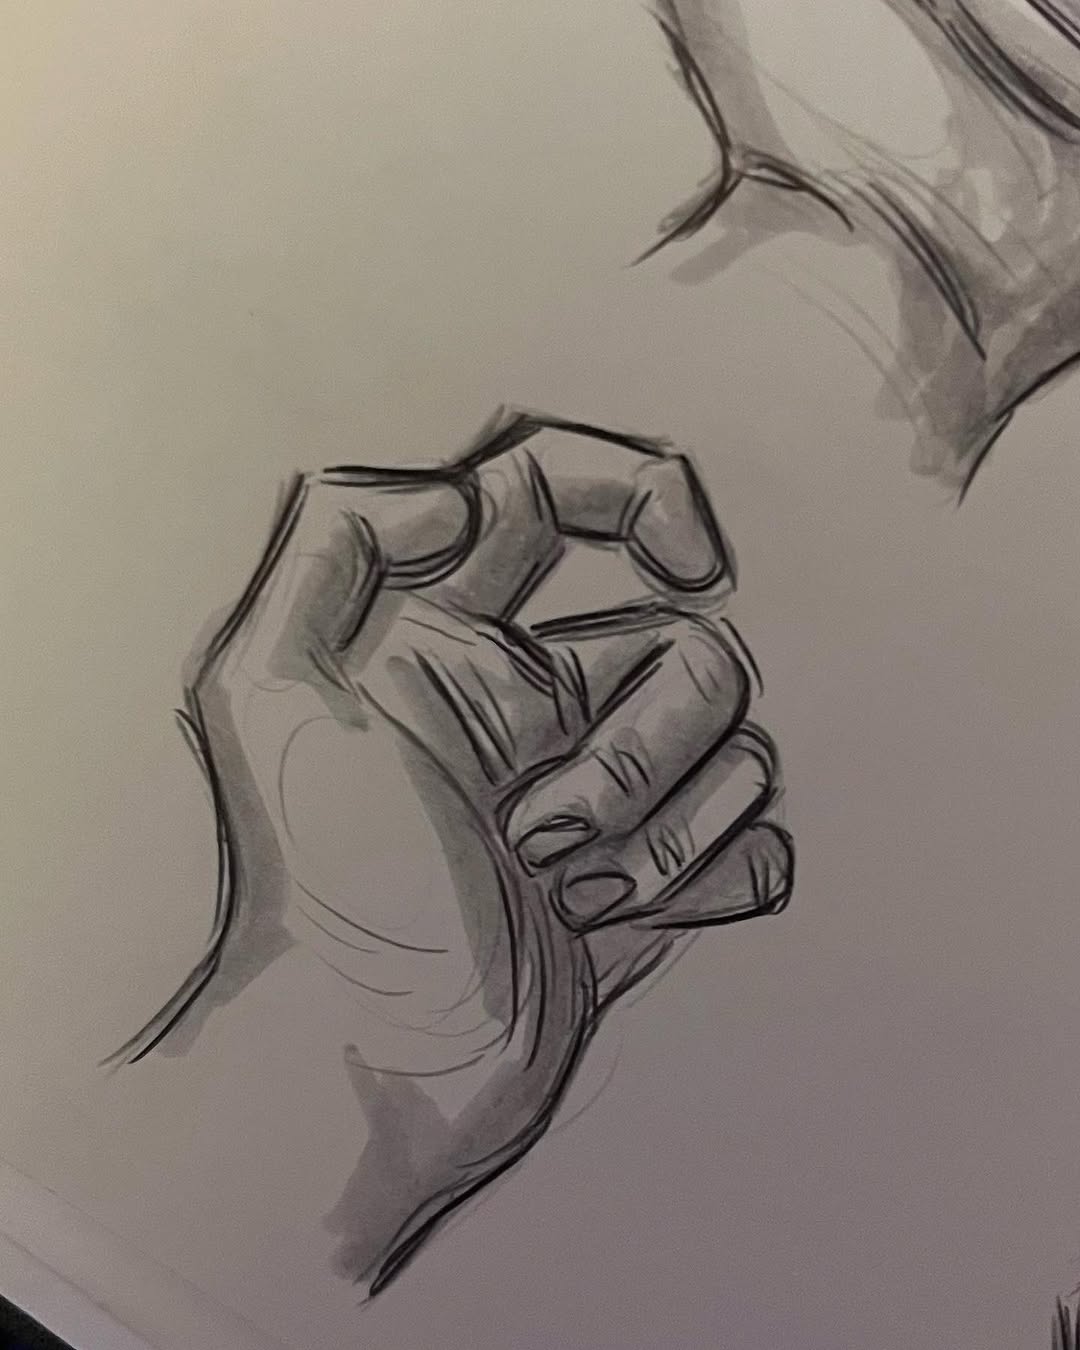
5. Study Hand Gestures to Capture Expression
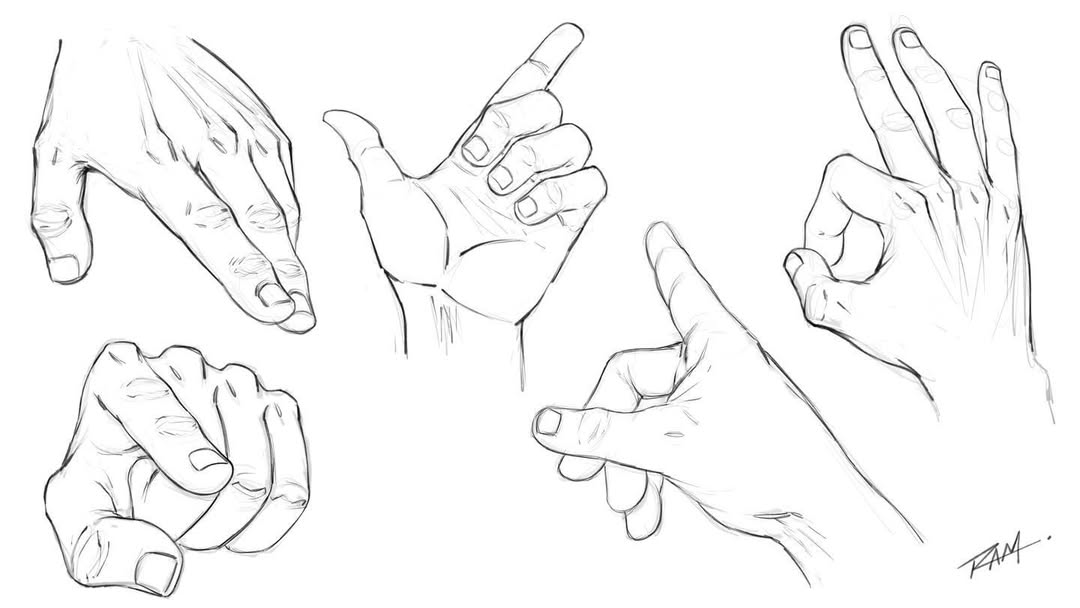
source @robert_marzullo
Hands are incredibly expressive, capable of conveying a wide range of emotions, from tension to relaxation, anger to joy. A clenched fist, a gently resting hand, or fingers spread in excitement all tell different stories. When drawing hands, pay attention to how fingers naturally position themselves in different emotional states. A relaxed hand has slightly curled fingers, while a tense hand has more prominent knuckles and visible tendons. Studying real-life gestures, movie stills, or even using your own hands as a reference will help you capture the nuance of hand expressions in your art.
6. Use Overlapping Shapes to Create Depth
source @marsa.art
One of the most common mistakes artists make when drawing hands is making the fingers look flat or disconnected from the palm. To create a sense of depth, use overlapping shapes where necessary. When fingers bend, some parts will naturally overlap others, creating a foreshortening effect. By observing how fingers interact and cast shadows on each other, you can make your drawings appear more three-dimensional and realistic.
7. Pay Special Attention to the Thumb
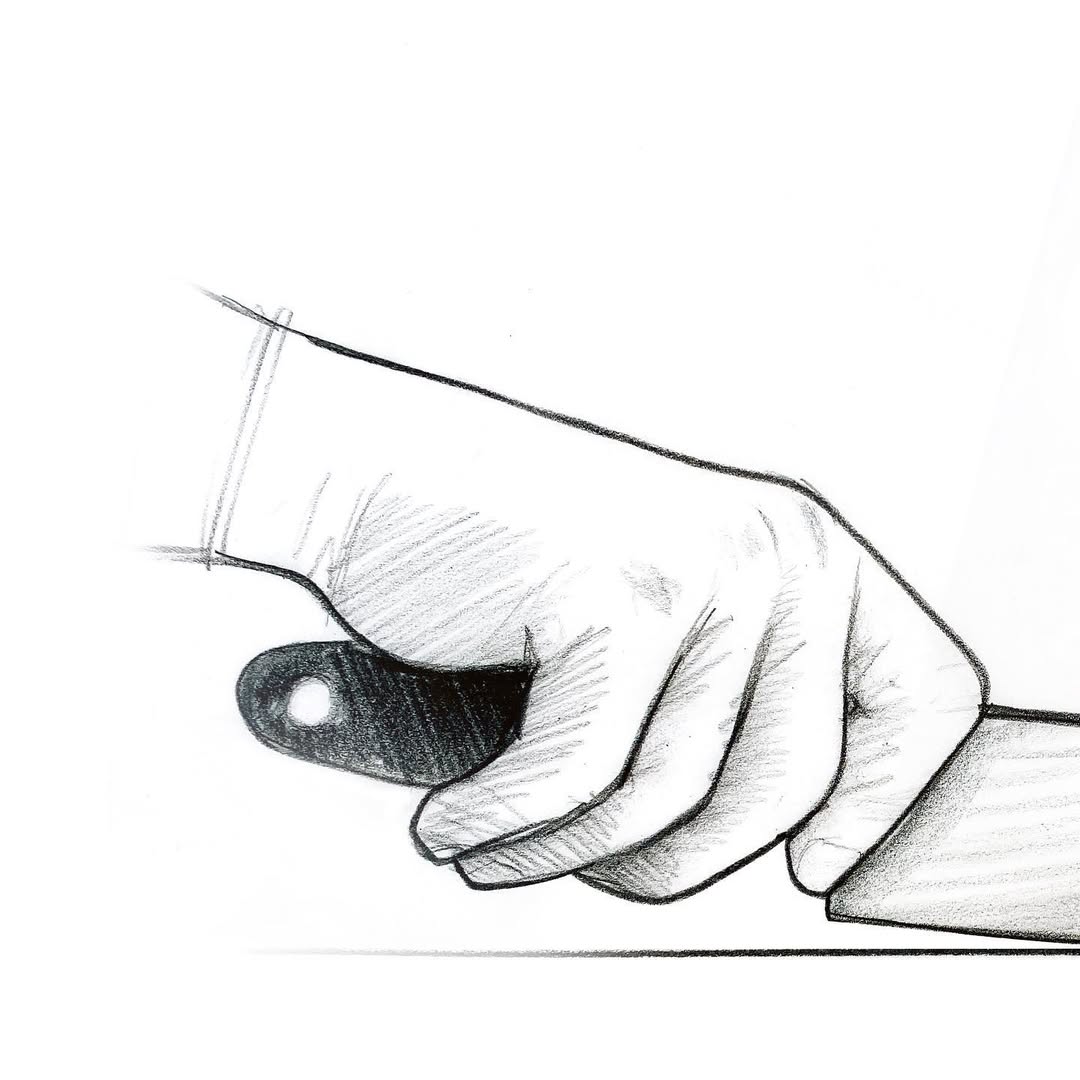
source @branchcreative
The thumb is unique in its range of motion, moving at a different angle than the other fingers. It plays a crucial role in gripping, holding, and interacting with objects. When drawing hands, always check the placement of the thumb in relation to the palm and fingers. A misplaced thumb can make the entire hand appear unnatural. Its base is thicker and more muscular compared to the other fingers, and it bends at a distinct angle due to its saddle joint.
8. Focus on Knuckle Placement and Flexibility
source @bucciblog
Knuckles are crucial in defining the structure and flexibility of the hand. Each finger has three knuckles (except the thumb, which has two), and they are not aligned in a straight line. Instead, they form a natural curve, especially when the hand is relaxed. Knuckles also act as pivot points, allowing fingers to bend. Ignoring their placement can result in stiff or unrealistic hands. When sketching, lightly mark where the knuckles are positioned and observe how they shift depending on the pose.
9. Avoid Making Fingers the Same Length
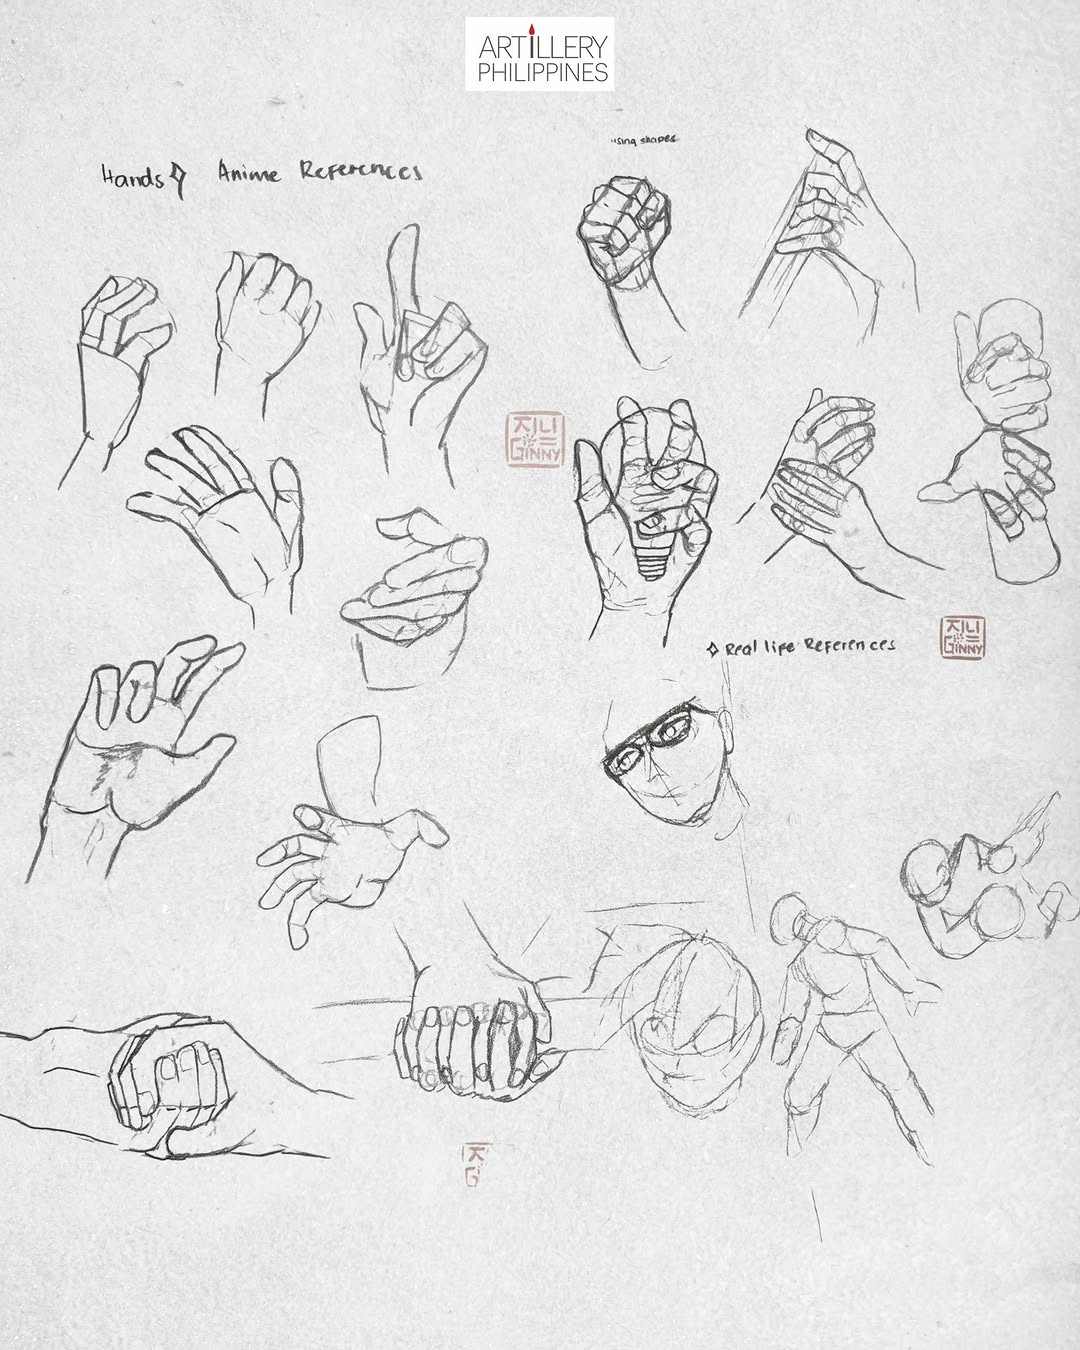
source @artillery.ph
One common mistake in hand drawing is making fingers appear equal in length. In reality, fingers have a specific proportion: the middle finger is the longest, followed by the ring finger, then the index finger, and lastly, the pinky. The thumb is positioned lower and has a completely different movement range. Understanding these differences will help create hands that look natural rather than cartoonish or robotic.
10. Pay Attention to Hand Proportions
source @beauxtron0
Proportion is key to making hands look realistic. The palm should be about the same length as the middle finger, and the width of the hand (excluding the thumb) is roughly the same as the length of the index finger. Another trick is to compare the size of the hand to the face—typically, an adult’s hand can cover their face from chin to forehead. Using these proportional relationships ensures that your hands don’t end up too small, too large, or awkwardly shaped.
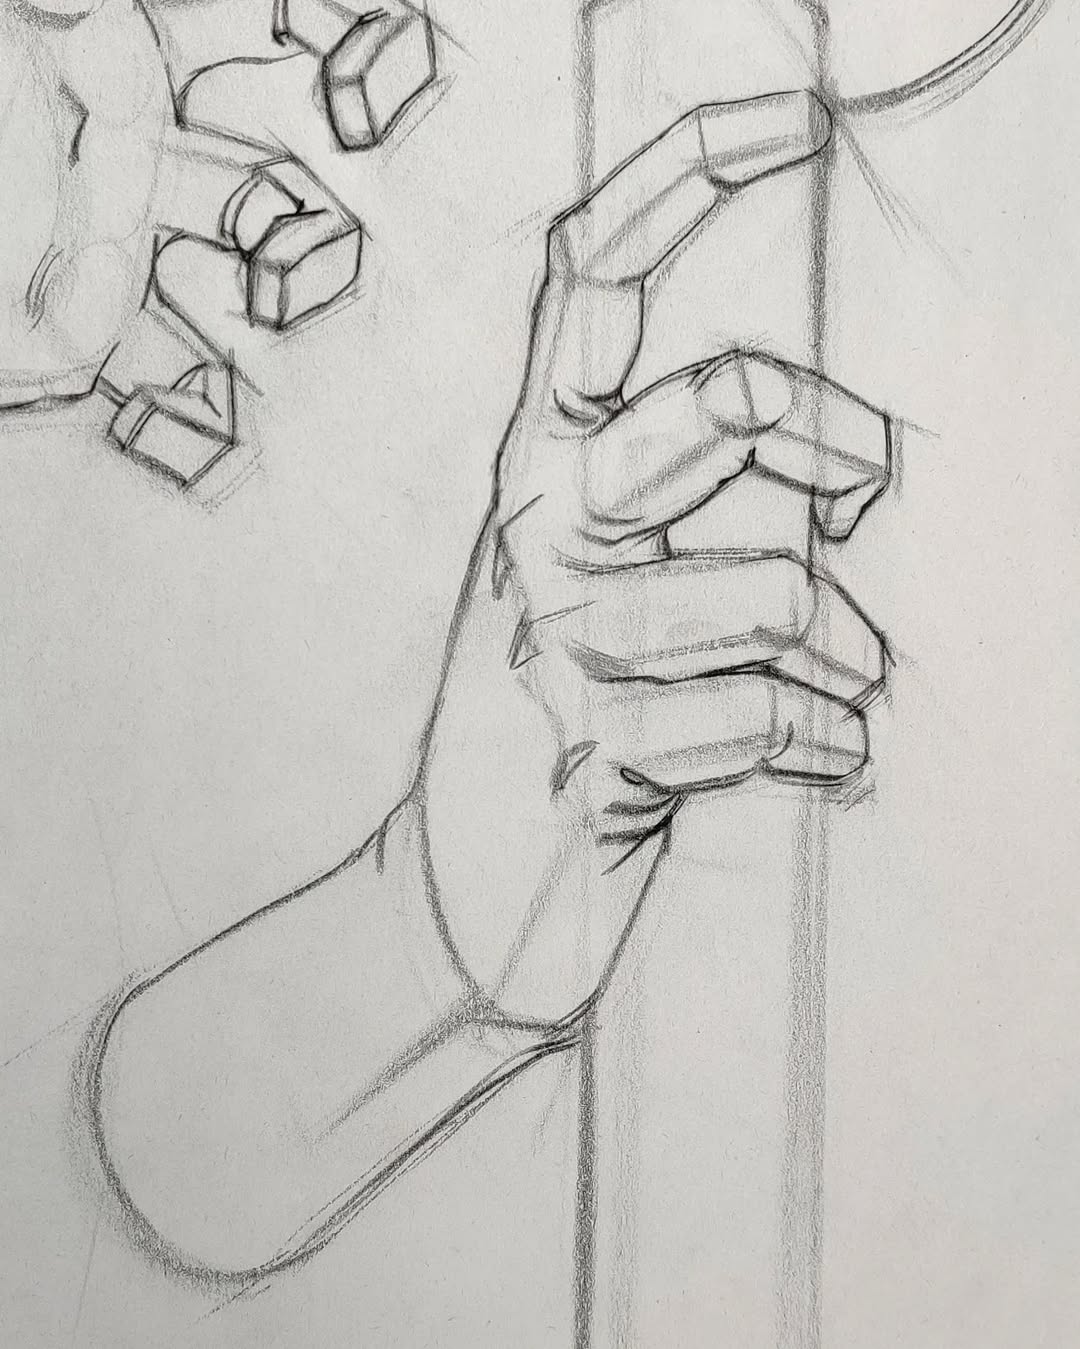
11. Understand How Hands Hold Objects
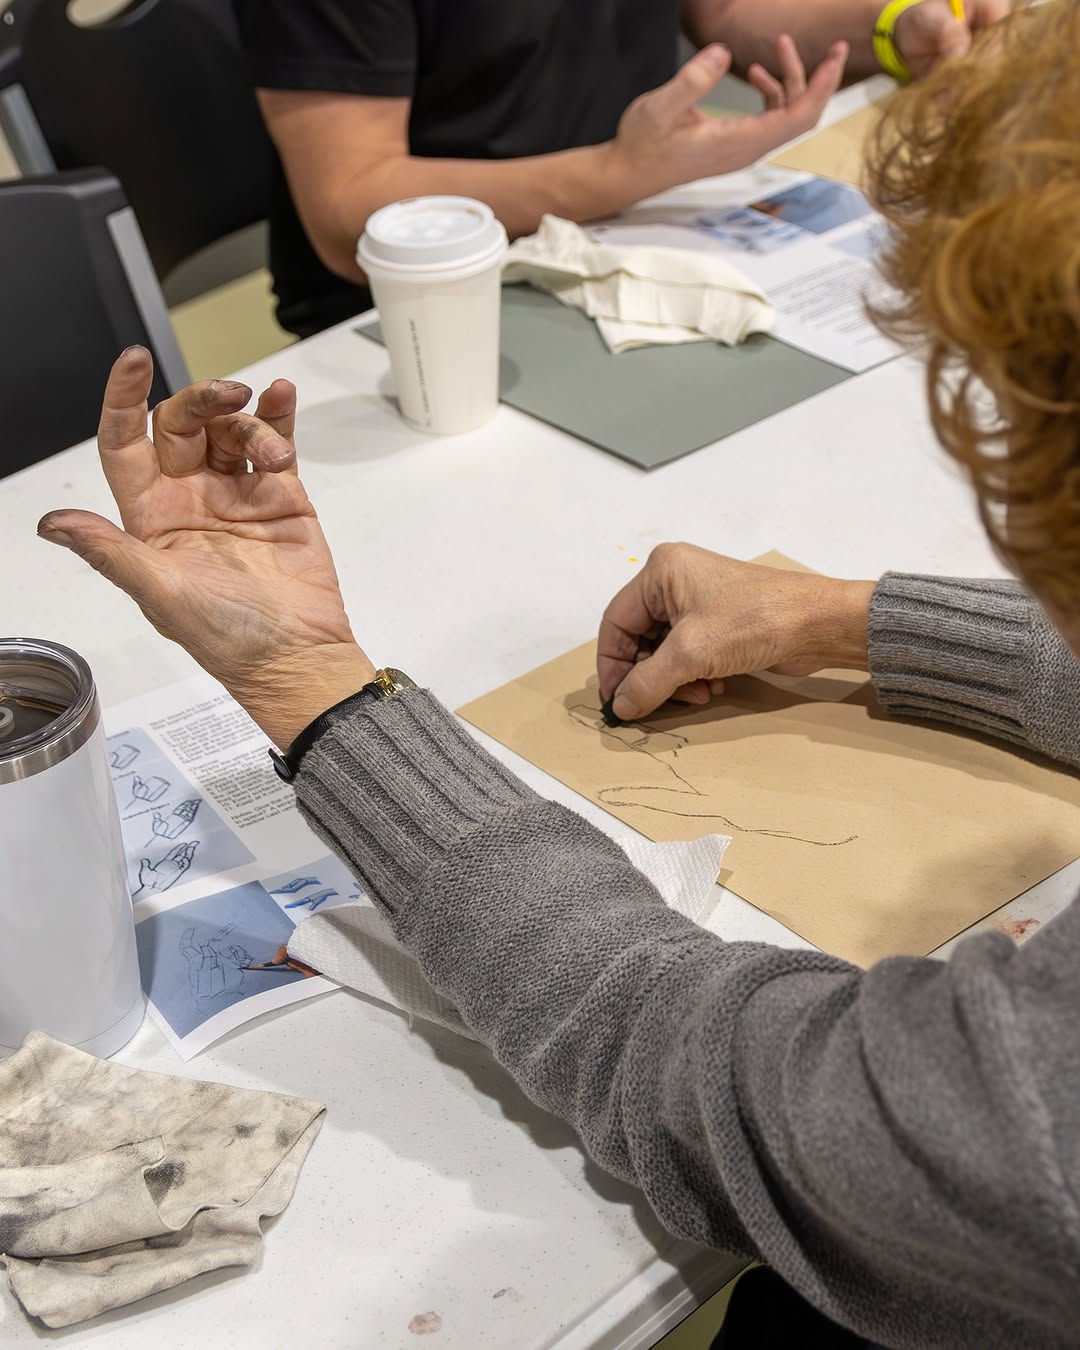
source @door2art
Hands interact with objects in many ways—gripping, pinching, holding, pushing, or pulling. The way fingers wrap around an object changes depending on its size and shape. A relaxed grip will have slightly curved fingers with space between them, while a firm grip will create tension with knuckles more pronounced. Studying real-life references or using a posable wooden hand mannequin can help you capture natural hand-object interactions more effectively.
12. Use Light and Shadow to Define Form
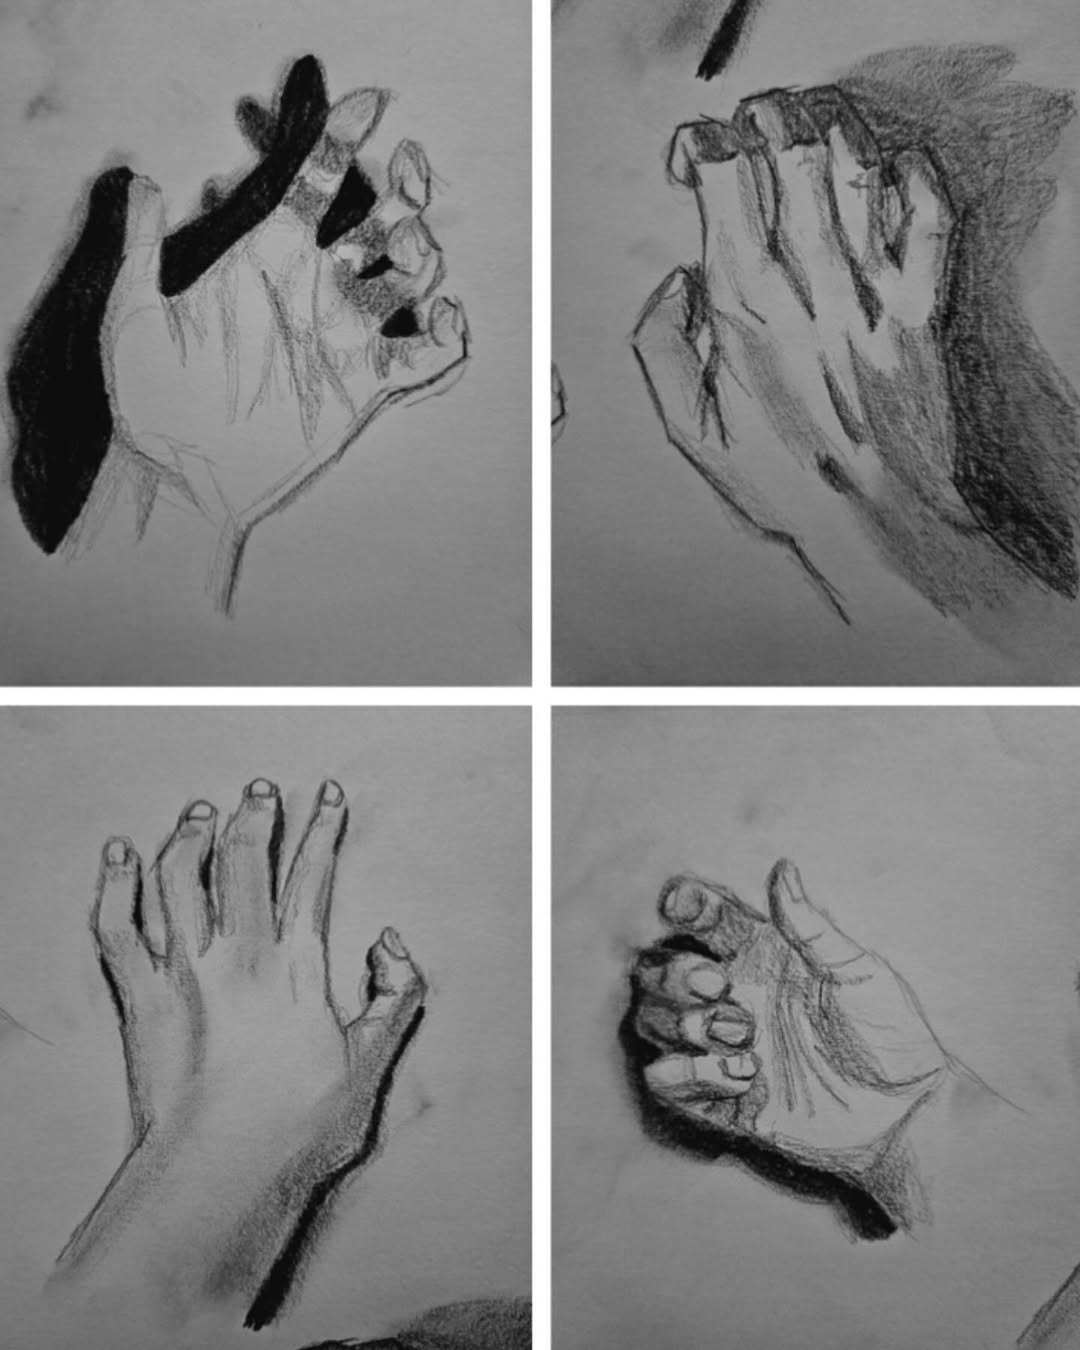
source @art_with_mrs._mcfaden_
Shading is essential to creating realistic hands. The way light falls on the hand affects how shadows form, emphasizing its three-dimensionality. Light usually hits the raised areas—like the tops of fingers and knuckles—while deeper areas, such as the creases between fingers and the palm, remain in shadow. To improve your shading skills, practice drawing hands under different lighting conditions and use tools like blending stumps or kneaded erasers to create smooth transitions.
13. Learn the Tapering of Fingers
source @robert_marzullo
Fingers are not uniform in shape; they gradually taper from the base to the tips. Many beginners mistakenly draw fingers as straight cylinders, making them appear stiff and unnatural. Each finger has unique characteristics: the index and ring fingers tend to be more symmetrical, while the pinky is thinner and often slightly curved. Paying attention to these details ensures a more organic and lifelike hand structure.
14. Keep Fingers Relaxed for Natural Poses
source @ilanaartstudio
A common mistake artists make is drawing fingers too rigidly, making the hand look robotic. When hands are at rest, fingers naturally curve slightly instead of sticking out straight. Study how fingers gently fold when relaxed, and avoid making them look overly tense unless depicting a gripping or dramatic pose. Loose, flowing lines will help capture a more natural look.
15. Master the Art of Foreshortening
source @dream2draw
Foreshortening is one of the trickiest aspects of drawing hands, as it involves making certain parts appear shorter due to perspective. When a finger is pointing toward the viewer, it may appear much shorter than its actual length. The key to successful foreshortening is using overlapping shapes and shading to suggest depth. Practicing with hand pose reference books or 3D model apps will help you get comfortable with these distortions.
16. Study Hand Wrinkles and Skin Folds
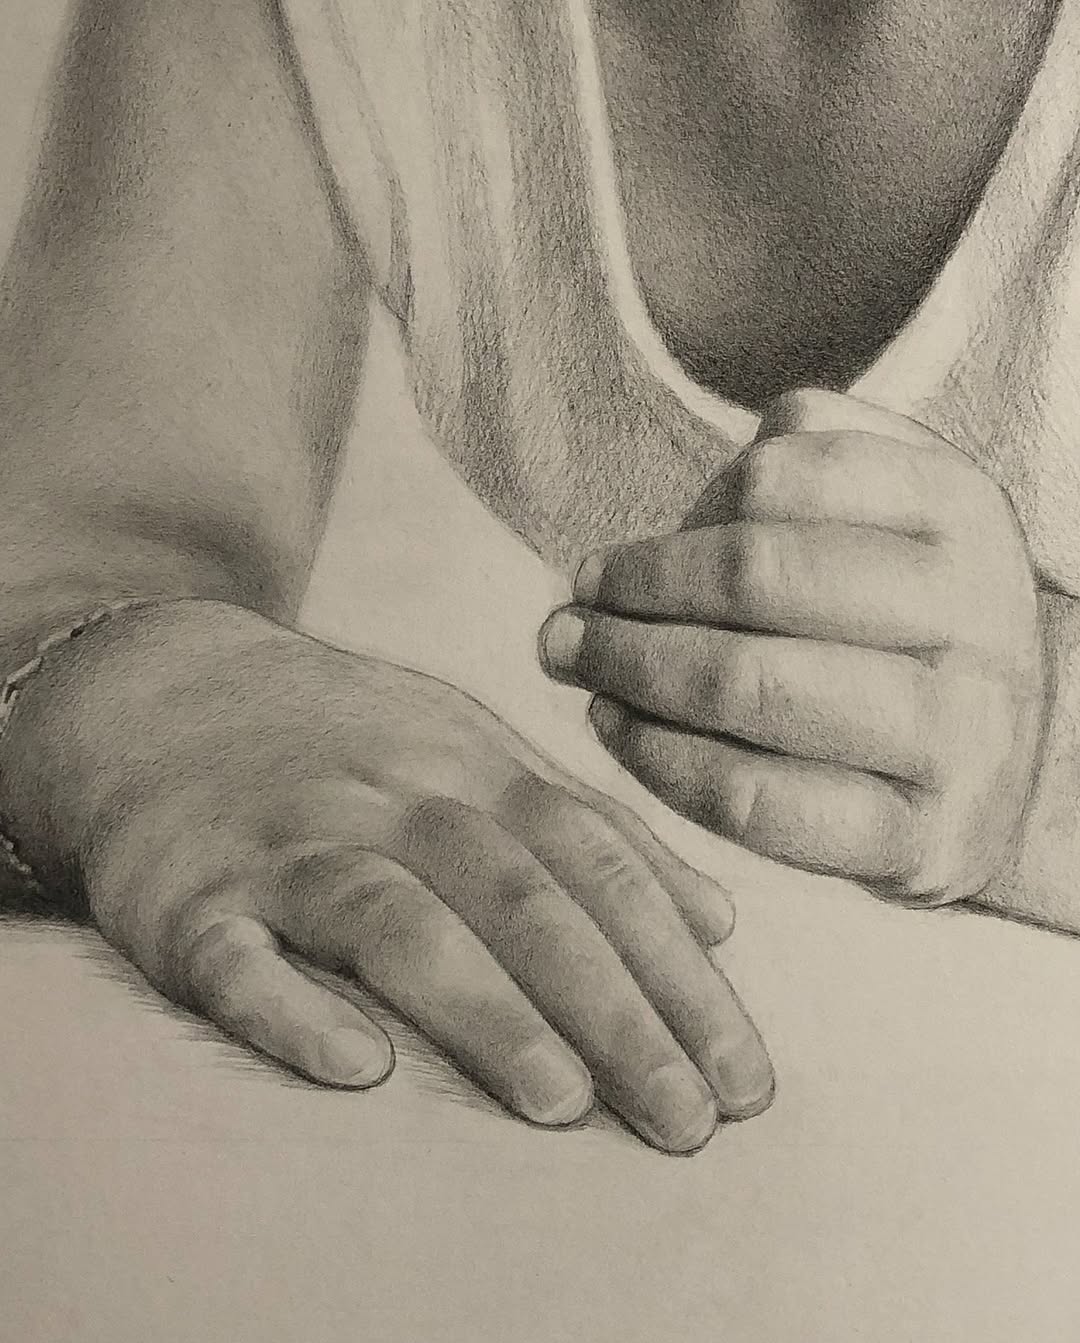
source @riverafineartstudios
Wrinkles, creases, and folds in the skin are essential details that add realism to hand drawings. These lines typically form around the knuckles, palm, and where fingers bend. However, avoid over-exaggerating them unless drawing an older person or a highly detailed piece. Observe how subtle these details appear in real hands, and incorporate them sparingly for a natural effect.
17. Simplify Nails and Cuticles
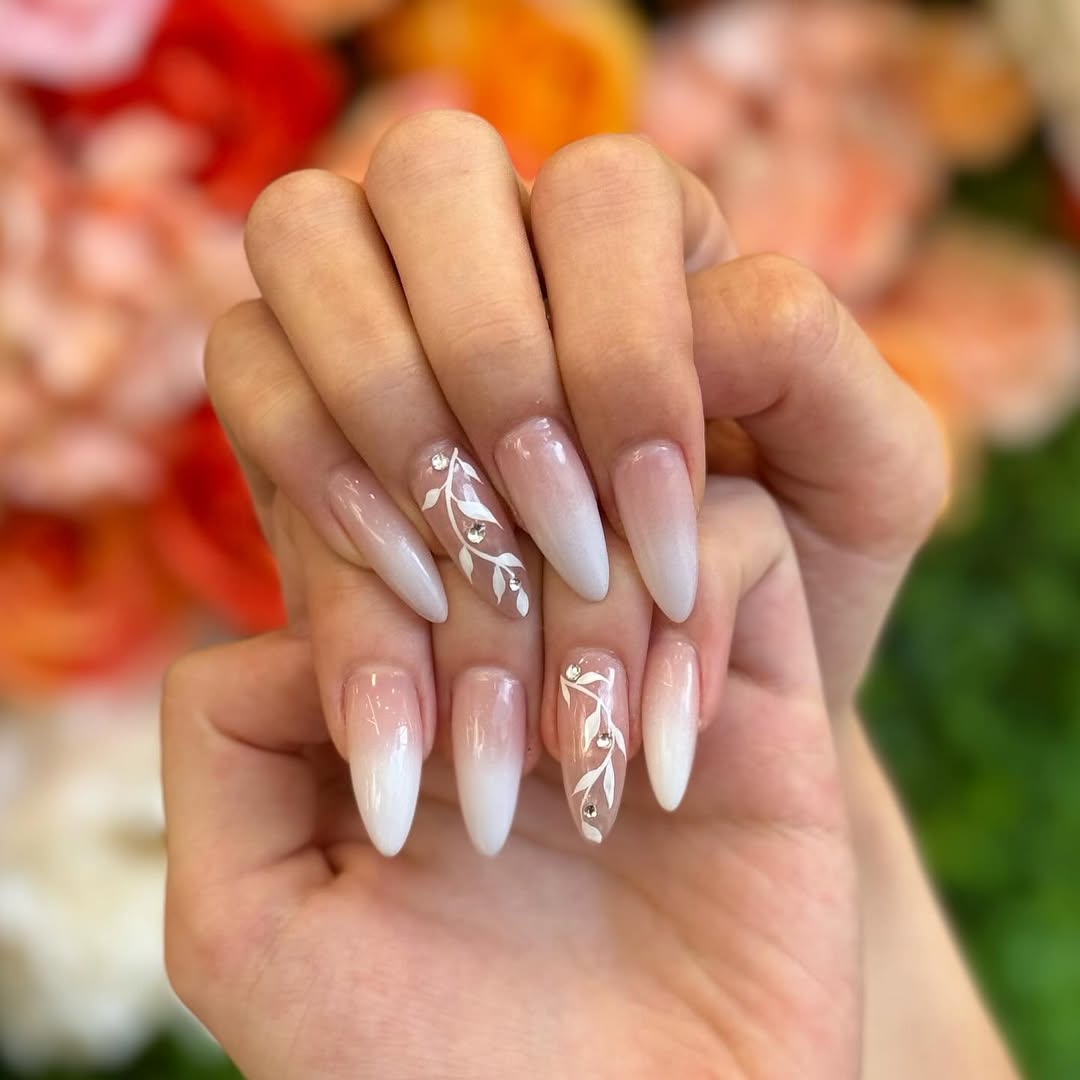
source @lilmissmodel14
Nails are an often-overlooked but crucial detail in hand drawings. They help define the shape of fingers but should be drawn subtly to avoid distraction. Instead of outlining the entire nail, suggest it with a light curve and slight shading. Avoid over-detailing cuticles unless working on a close-up drawing, as too much emphasis can make hands look unnatural.
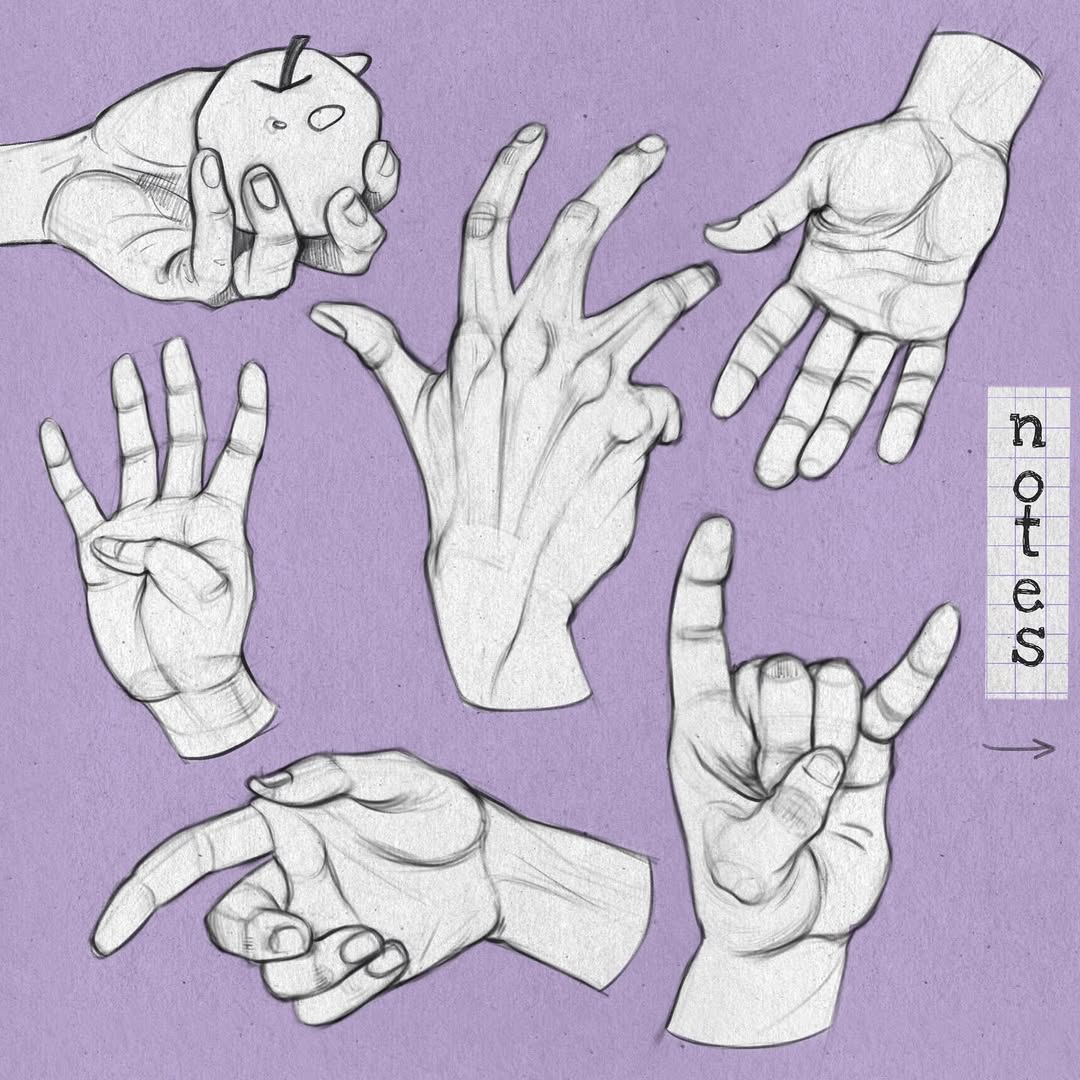
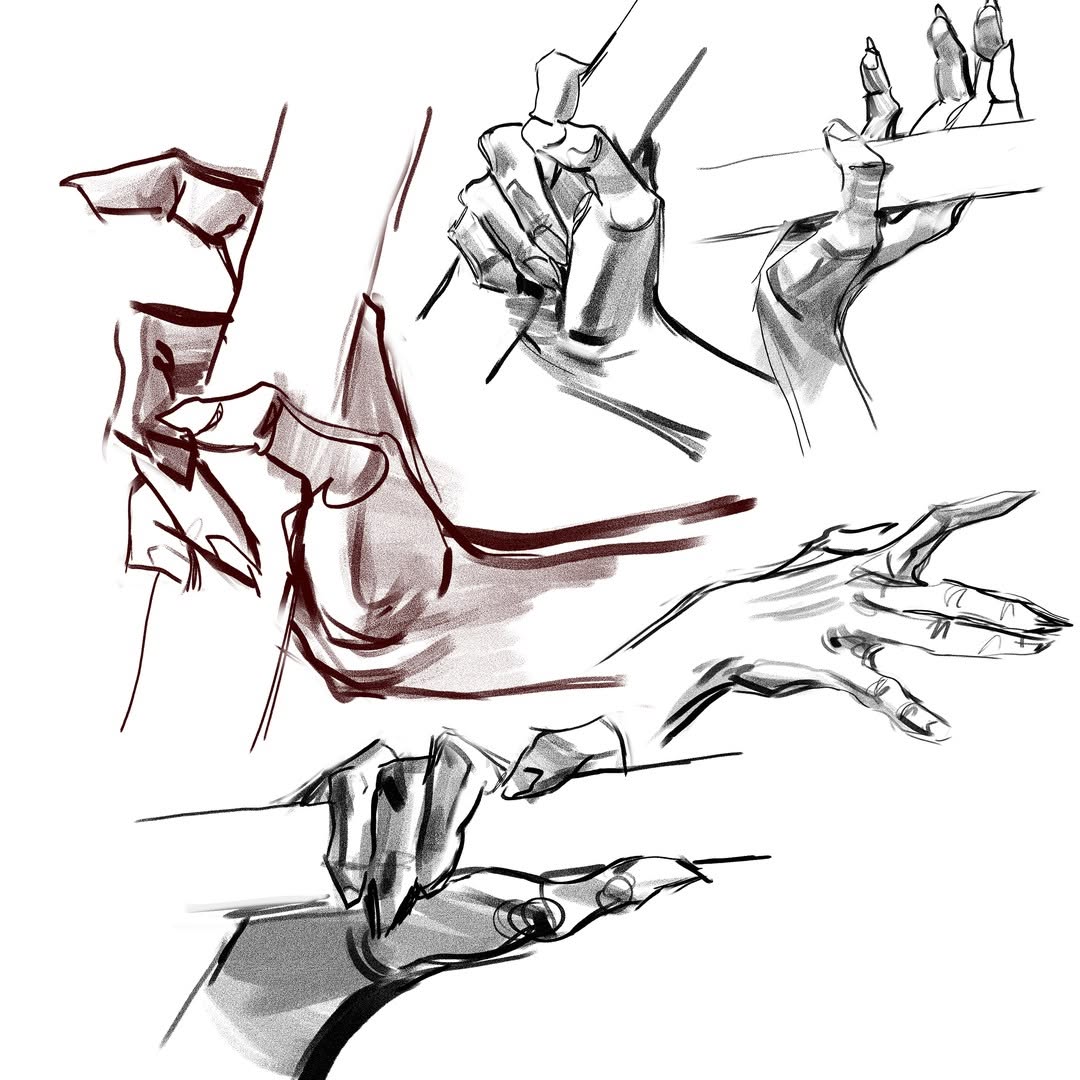
18. Experiment with Different Hand Positions
source @s.moloch
Sticking to the same generic poses limits artistic growth. Challenge yourself by drawing hands in diverse positions—clenching, grasping objects, stretching, pointing, or interacting with another hand. Observing your own hands or using a posable mannequin hand helps you explore a wider range of gestures. The more poses you practice, the more dynamic your hand drawings will become.
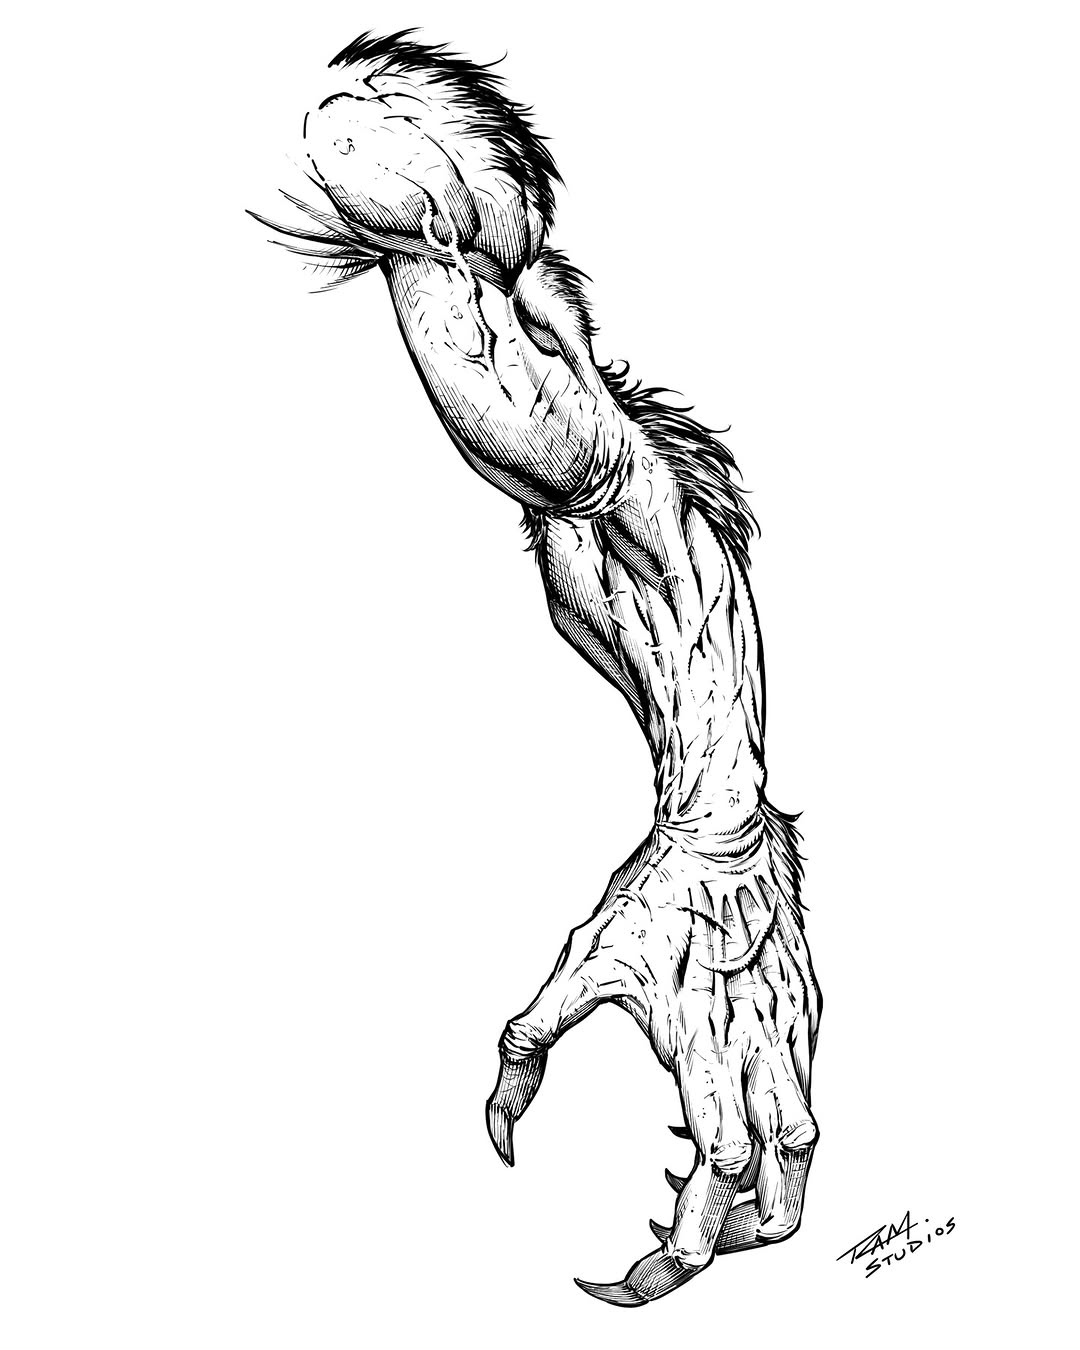
19. Understand the Difference Between Male and Female Hands
source @esedler_art
While hands share the same anatomy, subtle differences exist between male and female hands. Male hands are generally larger, with more prominent veins, knuckles, and a squared-off shape, while female hands tend to have slender fingers, softer curves, and smaller palms. These characteristics can be exaggerated in stylized art but should be kept balanced for realism. Understanding these differences will help you create diverse and expressive characters.
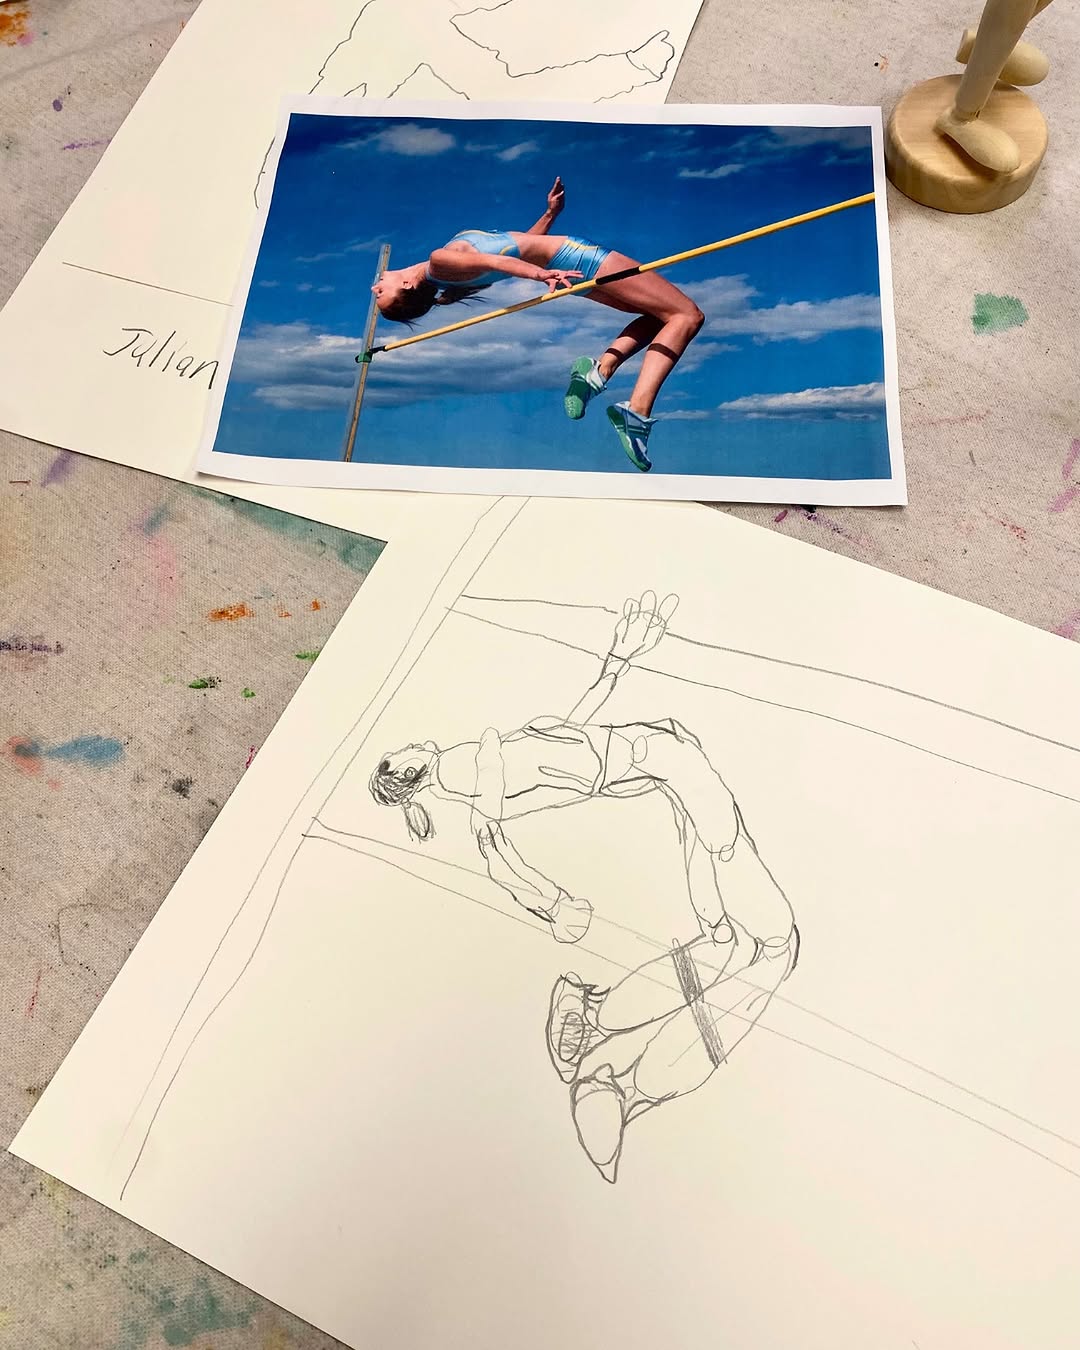
20. Use Reference Images and Hand Studies
source @ahmedaldoori_art
Even experienced artists rely on references when drawing hands. Studying high-quality reference images from art books, stock photos, or online gesture libraries helps improve accuracy and understanding. Additionally, completing dedicated hand studies—where you draw hands from different angles and lighting conditions—will dramatically boost your confidence and skill level over time.
21. Keep Practicing and Be Patient with Progress

source @dream2draw
Mastering hand drawing takes time, patience, and consistent practice. Even professional artists refine their technique over years of study. Set aside time for daily sketching exercises, experiment with different styles, and don’t be discouraged by initial struggles. Every drawing is a learning experience, and gradual improvement will lead to confident, expressive hand drawings. Keep pushing forward, and soon, drawing hands will feel second nature!