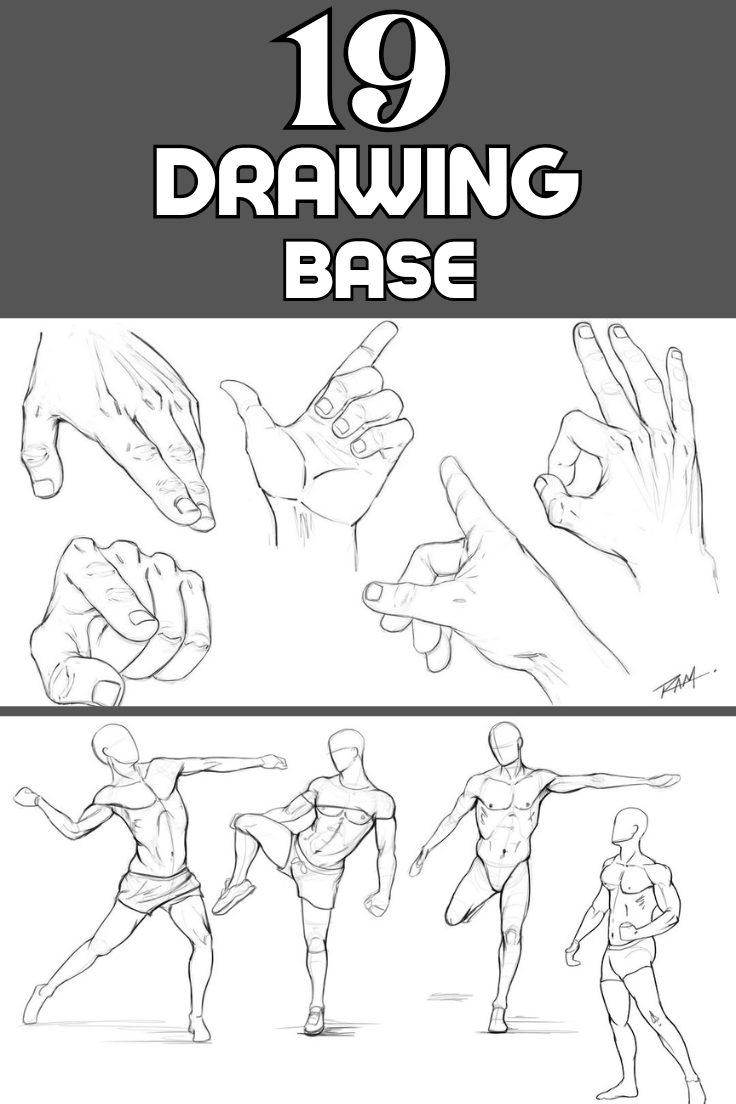
Every artist, whether a complete beginner or a seasoned professional, knows that a strong foundation is essential for creating stunning artwork. A well-structured drawing base sets the stage for proportion, depth, and fluidity in any piece. Without mastering the basics, even the most ambitious artwork can lack balance and realism. Whether you’re sketching portraits, anime characters, or landscapes, developing a solid base will improve your technique and enhance your confidence. But how do you ensure your drawings have a well-defined structure? In this guide, we’ll reveal 19 essential drawing base secrets that every artist needs to try. From fundamental techniques to game-changing tools, these insights will transform the way you approach art. Plus, we’ll recommend some must-have Amazon products that will help you refine your skills and take your art to the next level. Let’s dive in!
1. Master the Basic Shapes First
source @wingfoxworkshop
Every object you draw can be broken down into basic shapes such as circles, squares, and triangles. This foundational skill is crucial for constructing accurate and proportionate drawings. For example, when drawing a face, start with a circle for the skull and a rectangle for the jaw. If you’re sketching a body, use ovals for the torso and cylinders for the limbs. Practicing with these shapes helps you understand structure and ensures that your drawings are well-proportioned. Many professional artists start with geometric forms before refining details, making this a technique worth mastering. If you struggle with maintaining perfect shapes, consider using geometric templates ([Amazon link]) to help guide your sketches.
2. Use a Light Hand for Sketching
source @robert_marzullo
When sketching, it’s important to apply gentle pressure on your pencil. A light hand allows you to make corrections easily and keeps your drawings clean and refined. Heavy-handed sketching leads to dark, stubborn lines that are difficult to erase, often leaving smudges that can ruin the overall look of your work. To develop a delicate touch, try using high-quality sketch pencils ([Amazon link]) with different lead hardness levels. A softer pencil (like a 2H or HB) helps create lighter initial sketches, while a harder lead (such as 4B or 6B) can be used for bold, final outlines.
3. Follow the Line of Action
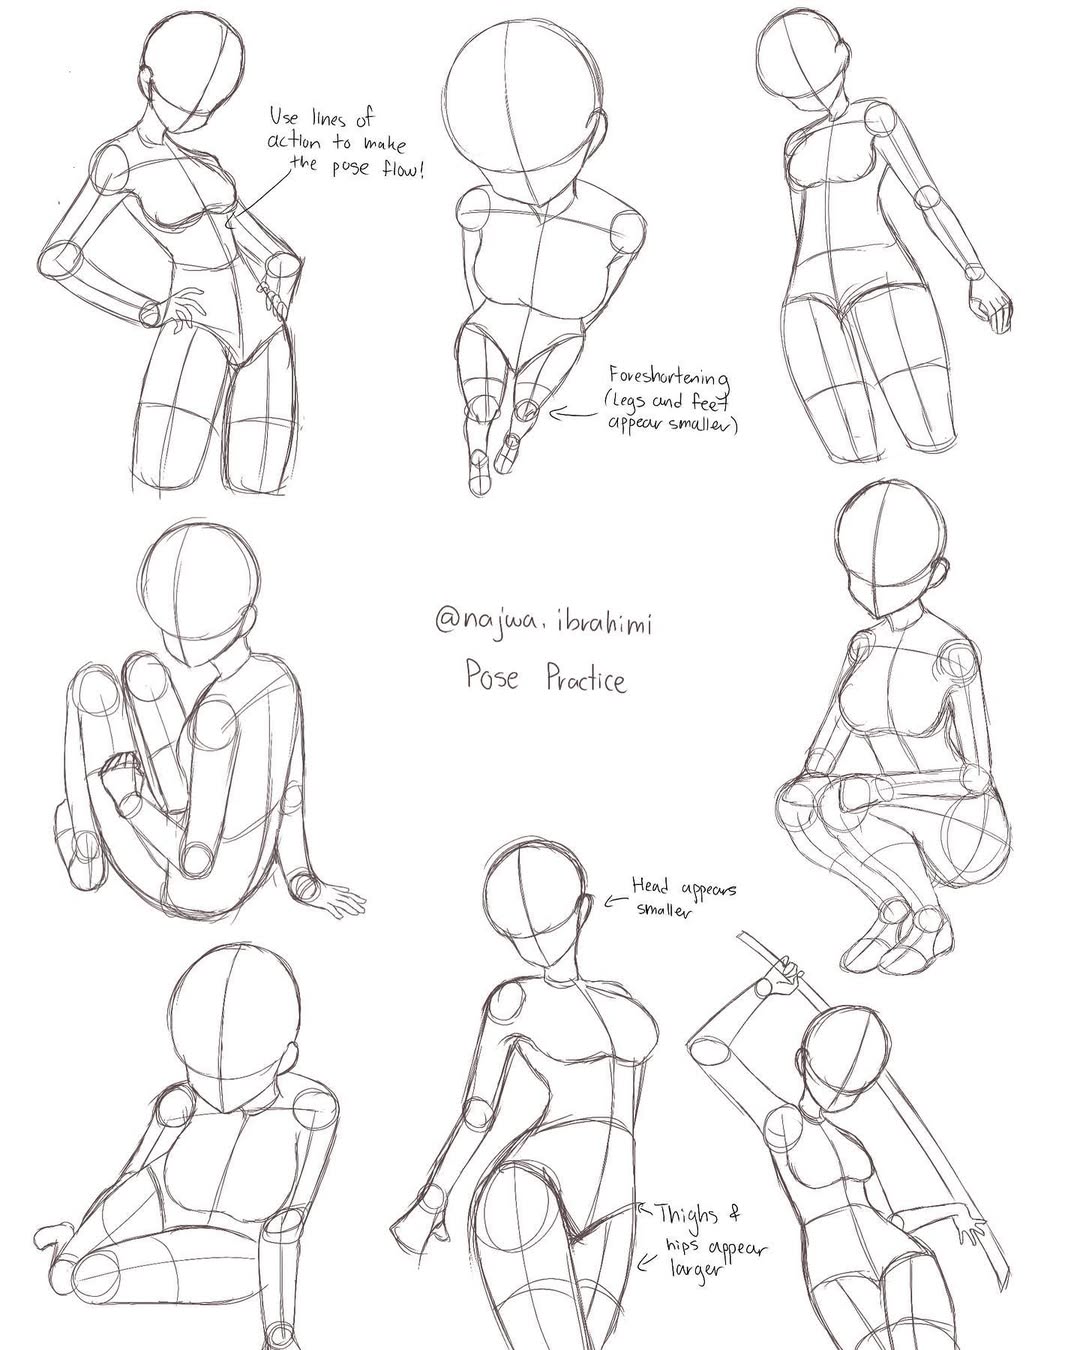
source @najwa.ibrahimi
One of the best ways to create dynamic and expressive drawings is by following the line of action. The line of action is an imaginary line that runs through a character or figure, indicating movement and posture. It helps artists capture energy and fluidity, making poses look more natural and engaging. This technique is widely used in figure drawing, animation, and character design. If you’re drawing a character in motion, start by sketching a single sweeping line that represents the body’s natural curve. This simple step instantly makes your artwork feel more lively and less stiff.
4. Learn Proportions with the Loomis Method
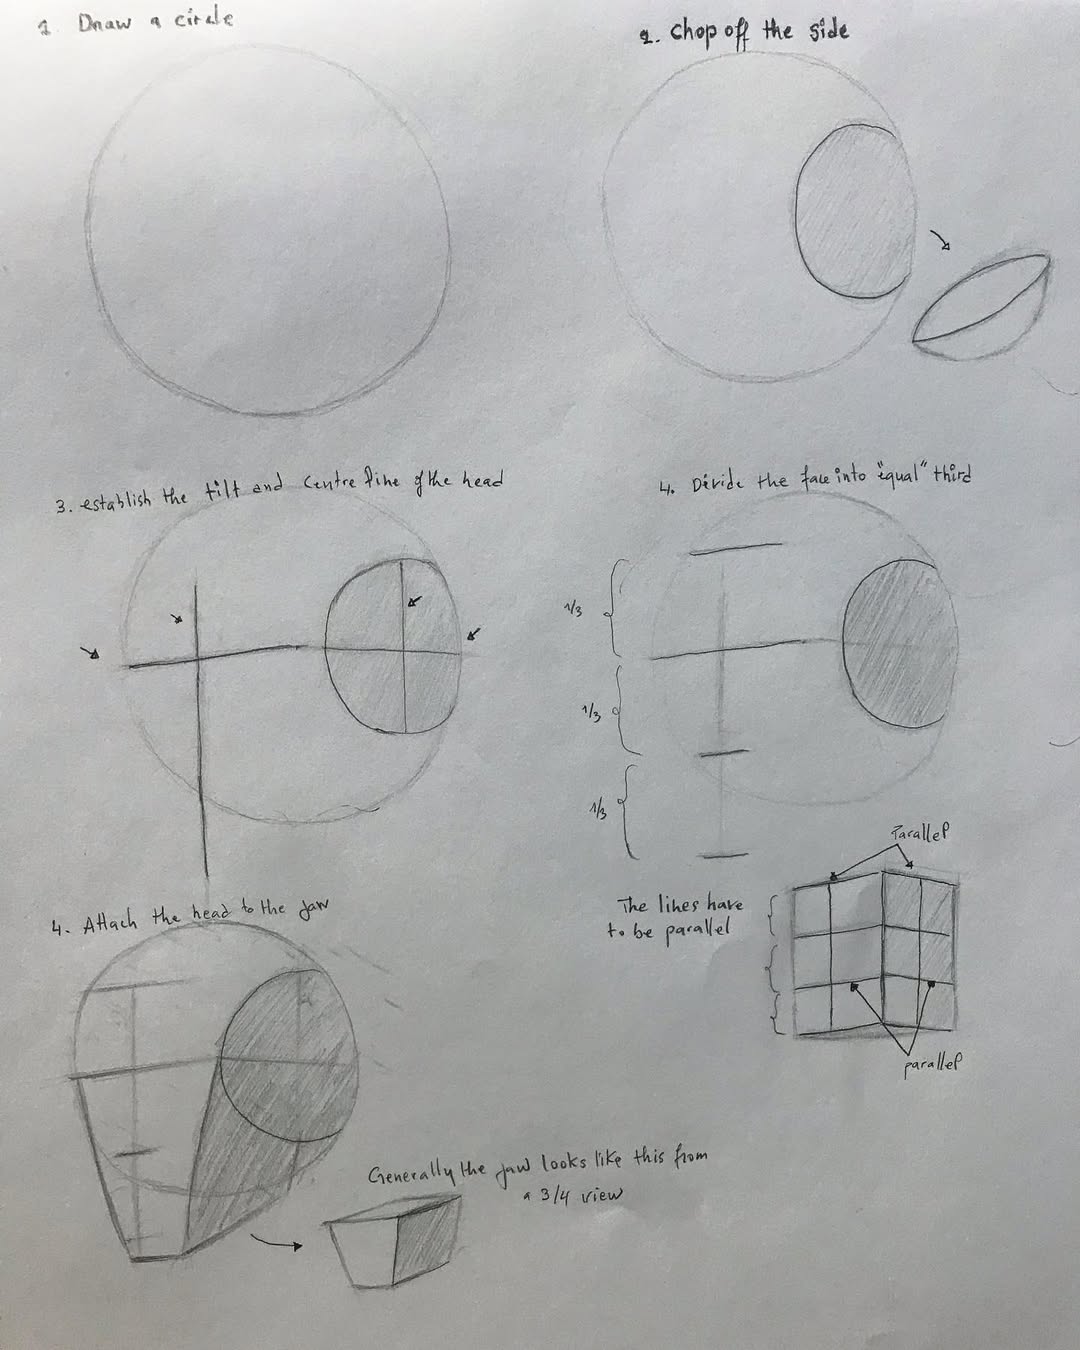
source @hassaneart
For artists struggling with human anatomy, the Loomis method is a lifesaver. Developed by illustrator Andrew Loomis, this technique simplifies figure drawing into manageable steps. By dividing the head and body into structured sections, the Loomis method helps artists achieve balanced proportions. It’s especially useful for portrait artists, as it ensures correct eye, nose, and mouth placement. If you’re serious about mastering proportions, we recommend reading “Figure Drawing for All It’s Worth” by Andrew Loomis ([Amazon link]).
5. Experiment with Gesture Drawing
source @thatartteacher_machado
Gesture drawing is an excellent way to practice capturing movement quickly. Unlike detailed sketches, gesture drawings focus on the overall form and motion of a subject rather than fine details. The key is to work fast—set a timer for 30 to 60 seconds and sketch loosely without overthinking. This exercise improves your ability to observe and analyze poses, making your drawings feel more spontaneous and expressive. Using a large sketchpad ([Amazon link]) can help you work freely without feeling constrained.
6. Understand Perspective Drawing
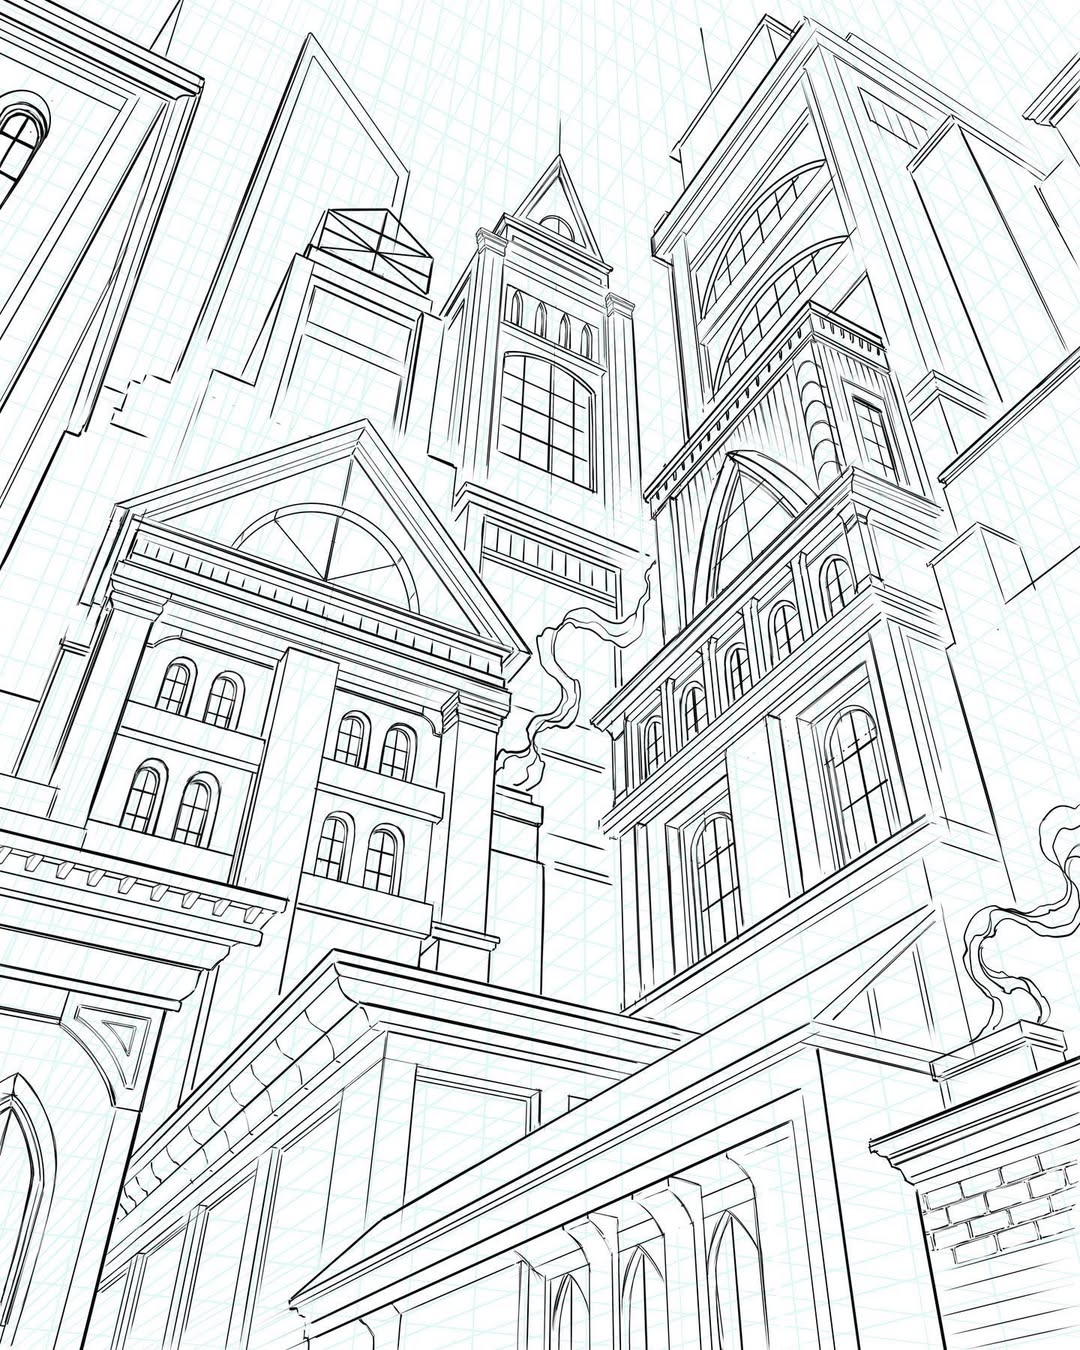
source @robert_marzullo
To create realistic and immersive scenes, understanding perspective is essential. Perspective drawing involves using vanishing points to give the illusion of depth and space. The most common types are one-point, two-point, and three-point perspective, each adding a different level of depth to your artwork. Beginners often struggle with this concept, but using perspective grids ([Amazon link]) makes it easier to practice. Learning perspective helps with drawing backgrounds, buildings, and objects that appear three-dimensional.
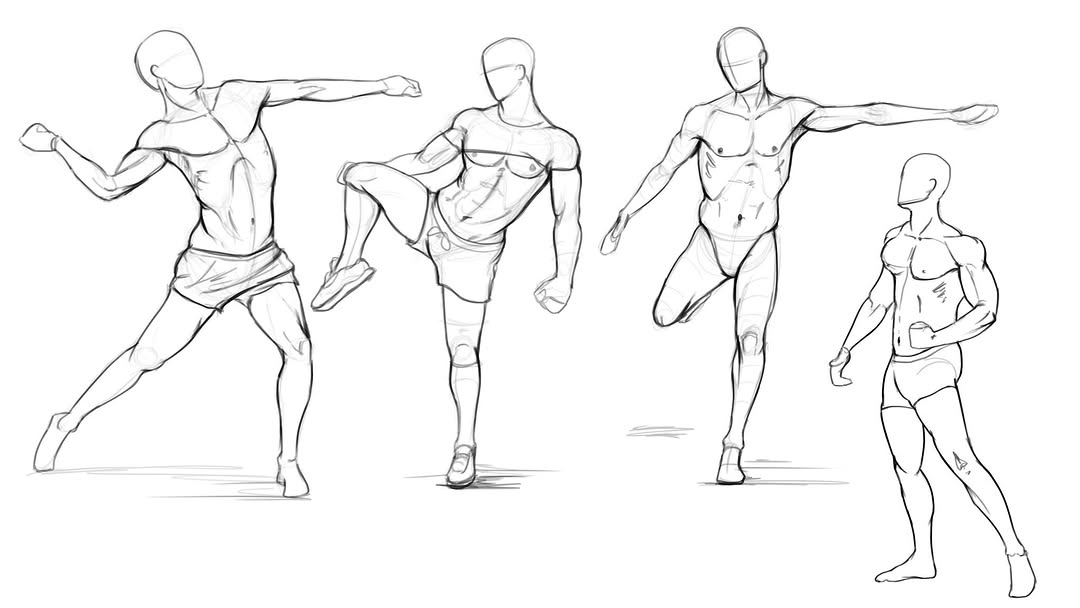
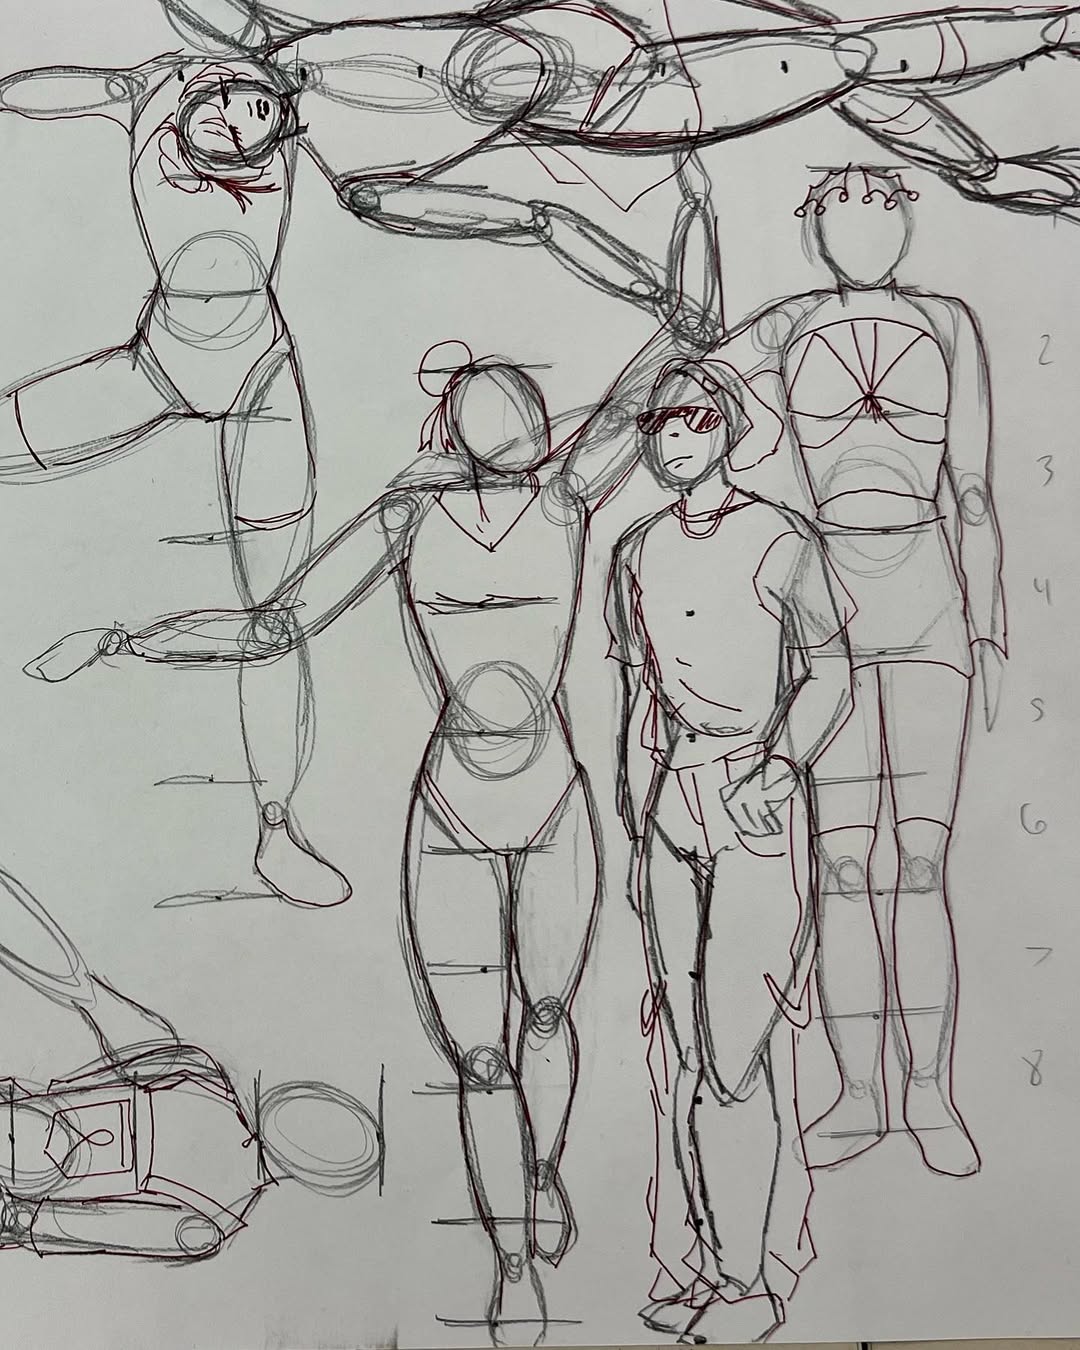
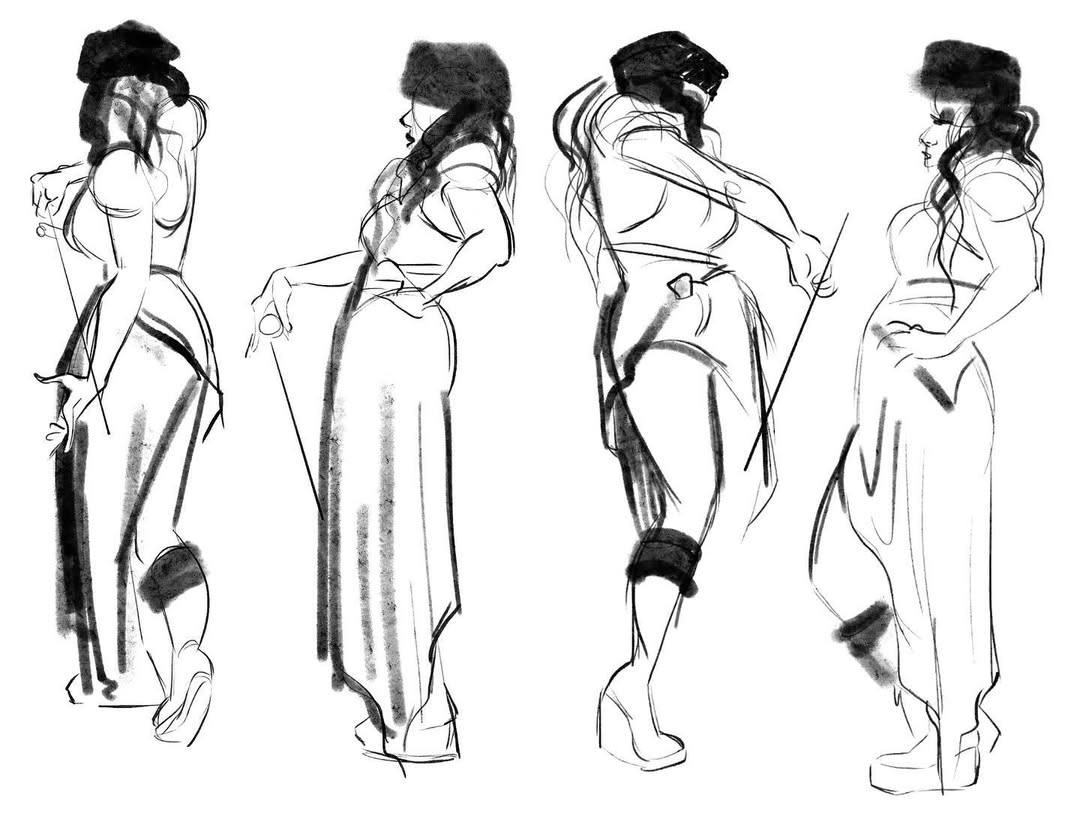
7. Develop a Solid Figure Drawing Base
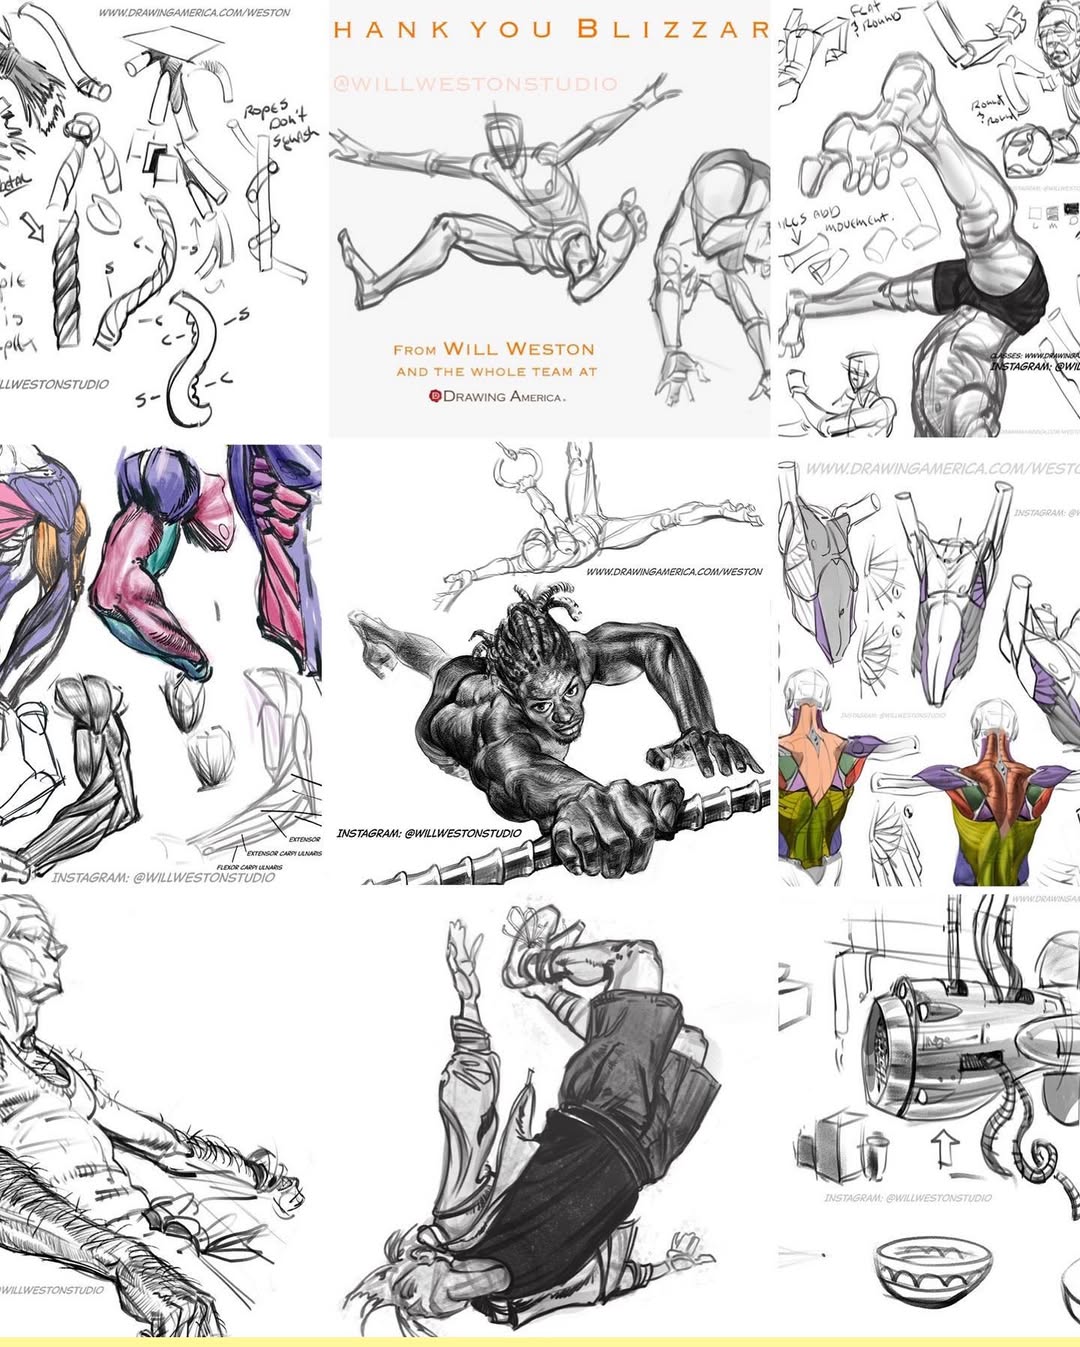
source @willwestonstudio
When drawing figures, starting with a stick-figure framework can be incredibly helpful. This basic structure helps define proportions and movement before adding details. Many artists also use mannequins to visualize how the human body moves in space. If you’re looking for a tool to improve your figure drawing, investing in an articulated drawing mannequin ([Amazon link]) can provide a physical reference to study poses from different angles.
8. Practice with Reference Images
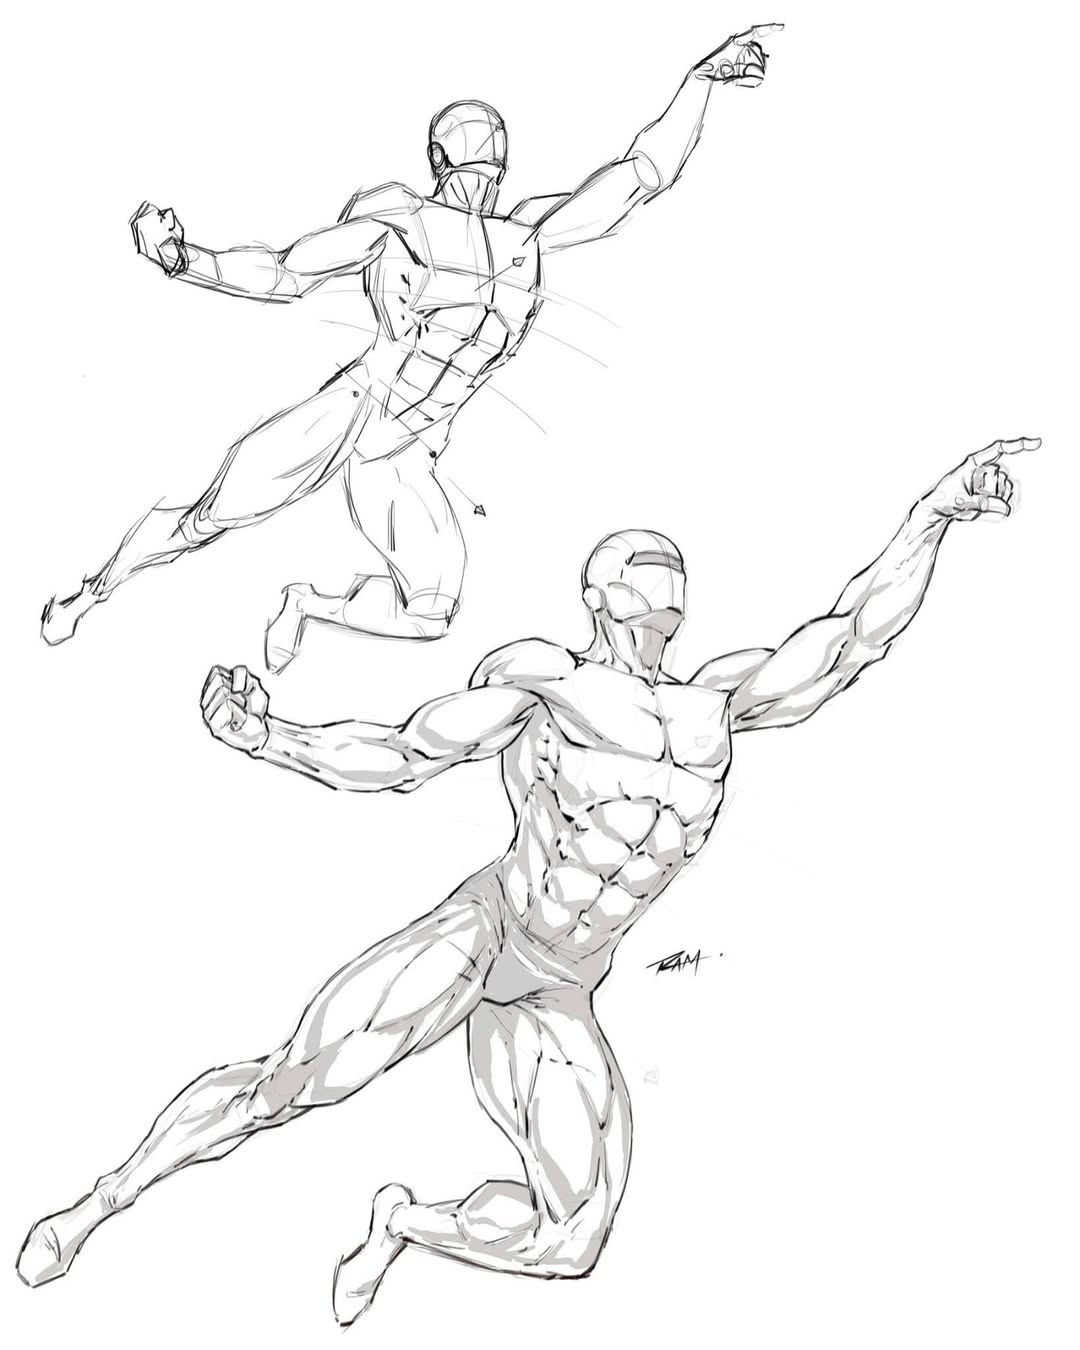
source robert_marzullo
Using reference images is not “cheating”—it’s an essential learning tool. Professional artists frequently use references to study lighting, anatomy, and proportions. Whether you’re drawing from photographs or observing real-life subjects, references help improve accuracy and detail. Websites like Unsplash and Pinterest offer a vast collection of high-quality images for artists to practice with.
9. Train Your Hand with Contour Drawing
source @thatartteacher_machado
Contour drawing is a powerful technique that enhances your observation skills and hand-eye coordination. By focusing solely on the outline of a subject without looking at your paper, you force yourself to pay attention to every subtle curve and detail. This exercise helps you learn to draw what you actually see, rather than what you think you should see. An advanced version of this technique is blind contour drawing, where you don’t even glance at the page while sketching. It may feel uncomfortable at first, but the results will improve your accuracy and confidence in your lines. For a better experience, use a smooth sketchbook paper ([Amazon link]) that helps your pencil glide easily without smudging.
10. Build Volume with Cross-Hatching and Shading
source @nirvanamama108
Shading can make or break your artwork. Cross-hatching, stippling, and blending are all techniques used to create shadows and give your drawings volume. Cross-hatching involves drawing parallel lines that cross each other in different directions to create depth, while stippling uses small dots for a similar effect. Start with light pressure to build layers gradually and keep the darker areas well defined. To elevate your shading skills, practice using different types of pencils ([Amazon link]), such as a soft 4B for darker shadows and a hard 2H for lighter tones. The more you practice these techniques, the more life and realism your drawings will have.
11. Master the Art of Negative Space
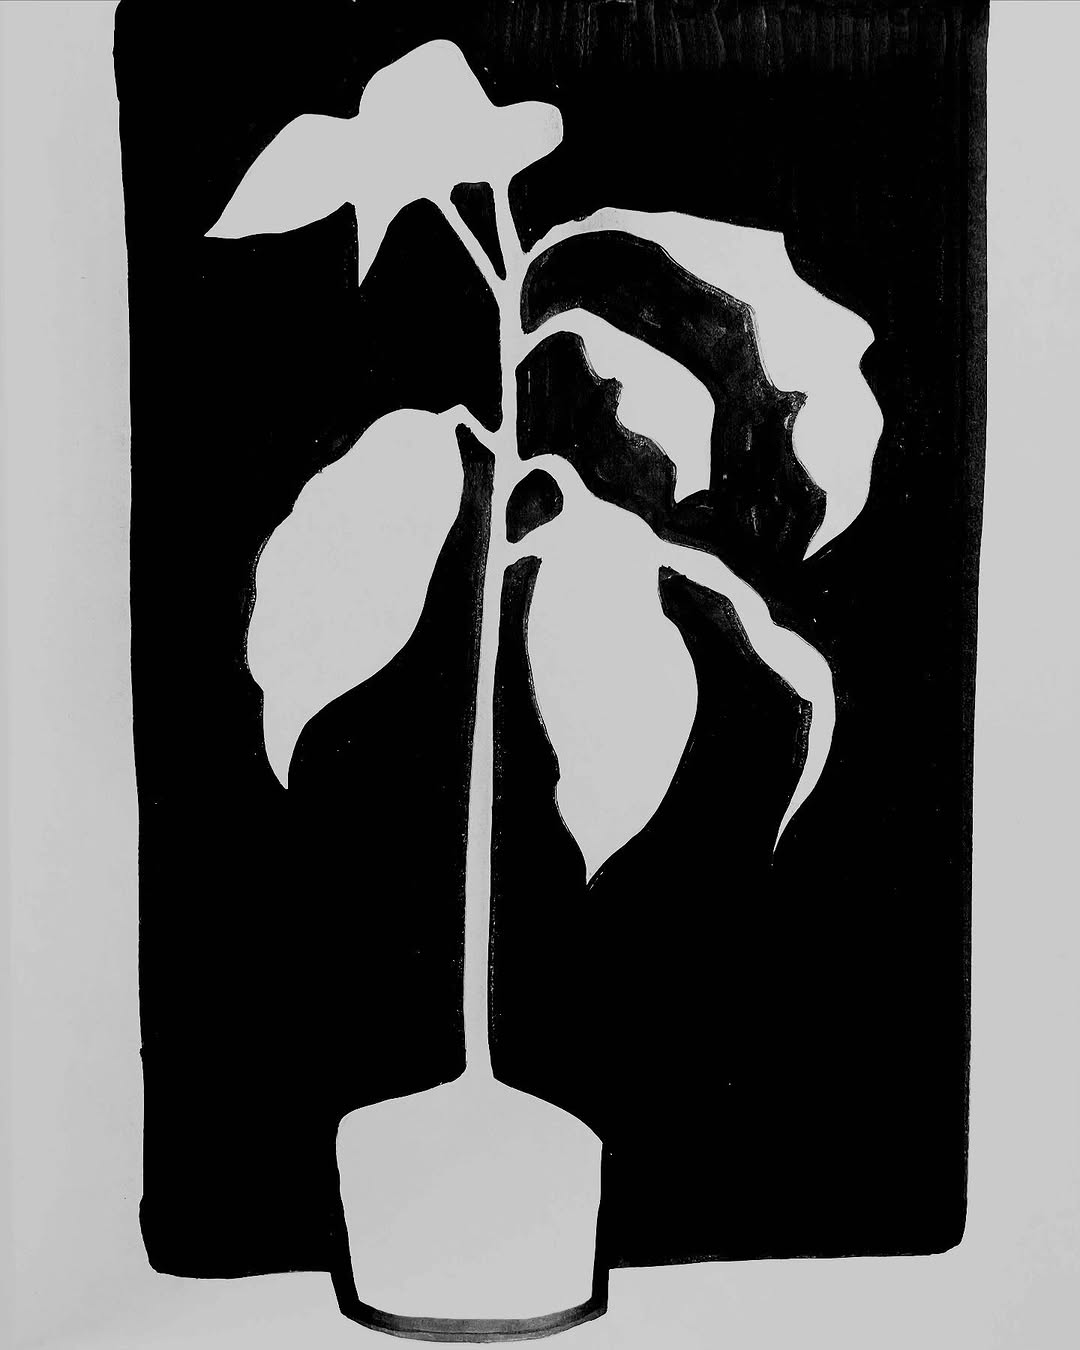
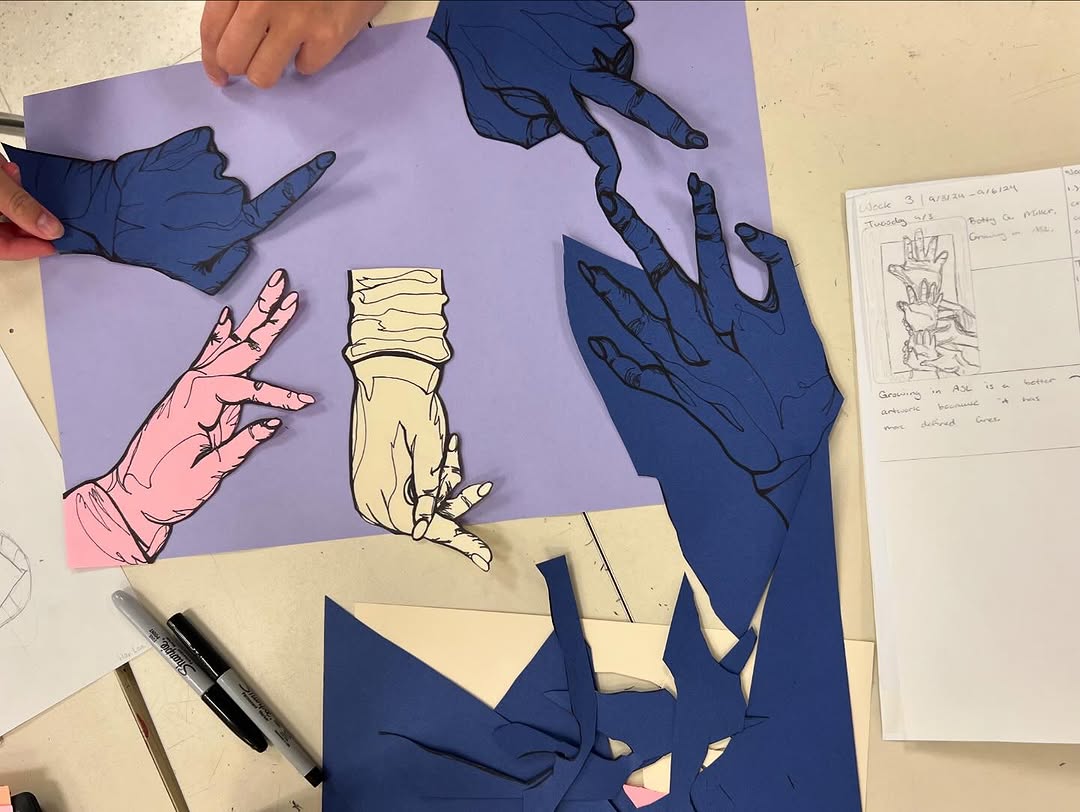
source @greymonkeymonk
Negative space is the space around and between the subject of your drawing. Often overlooked, it plays a crucial role in defining shapes and giving your artwork balance. By focusing on the negative space, you can make your subject stand out more and achieve a more accurate representation. For example, when drawing a hand, the space between the fingers defines their shape, making the hand appear more realistic. Pay attention to how negative space interacts with your subject, and try to sketch it as carefully as the subject itself. Practicing negative space drawing with complementary colors ([Amazon link]) in your sketches can also help you understand its impact more clearly.
12. Get Comfortable with Digital Drawing Bases
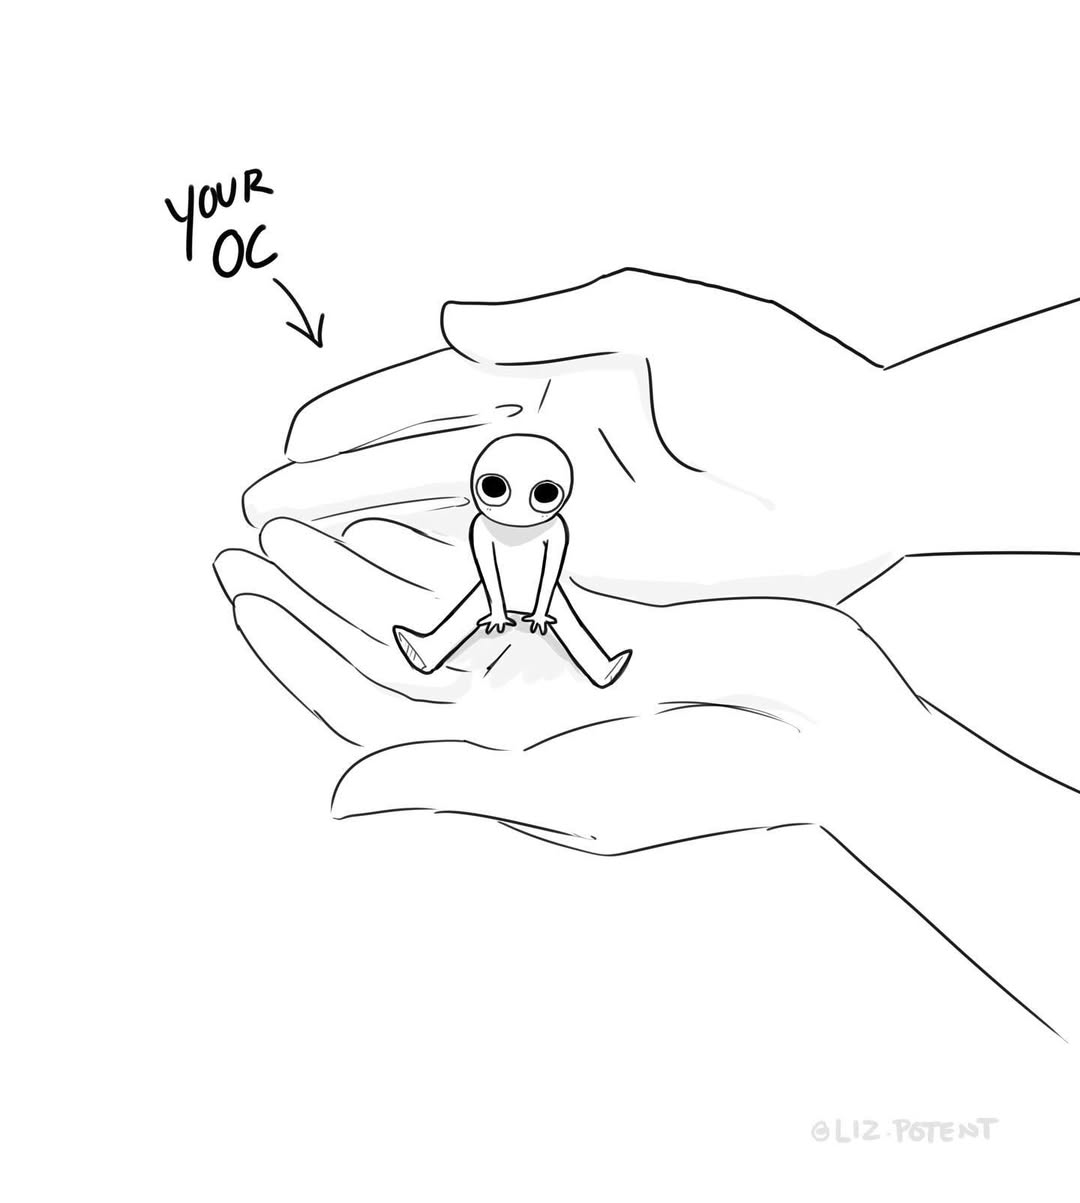
source @liz.potent
Digital art has become a major trend, offering incredible flexibility and precision. Using a drawing tablet allows you to create multiple layers, adjust shapes quickly, and explore color palettes with ease. One of the biggest benefits of digital drawing is the ability to experiment without committing to a permanent sketch—mistakes can be erased or adjusted in seconds. Software like Procreate, Photoshop, or Clip Studio Paint provides excellent tools for artists of all skill levels. If you’re new to digital art, start with a stylus and tablet ([Amazon link]) that offer responsive pressure sensitivity. These tools will give you the same experience as traditional drawing but with more convenience and options.
13. Practice Layering for Better Composition
source @dianabuitragoart
Layering your sketches is an essential practice for achieving more detailed and organized compositions. Start by creating a rough outline of the base elements and then progressively add details. Rather than completing one section before moving on to the next, work on different areas simultaneously. This allows you to make adjustments in real time and results in a more cohesive artwork. Additionally, using layered sketching techniques ([Amazon link]) with tracing paper or a tablet will help refine the finer details. With practice, layering will become second nature, helping you approach your drawings with more confidence and precision.
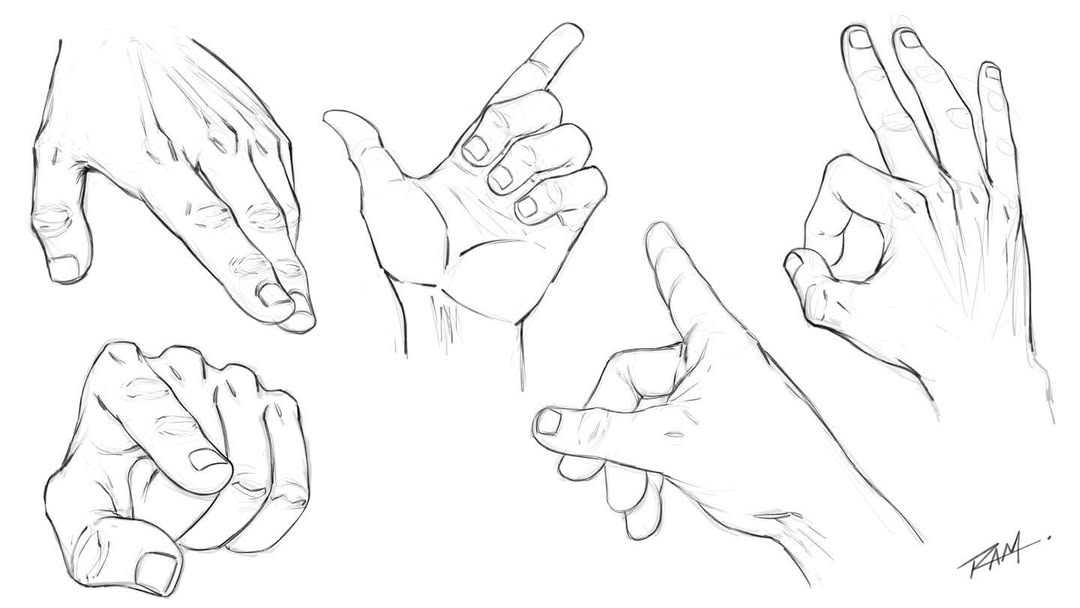
14. Learn to Draw Hands and Feet Properly
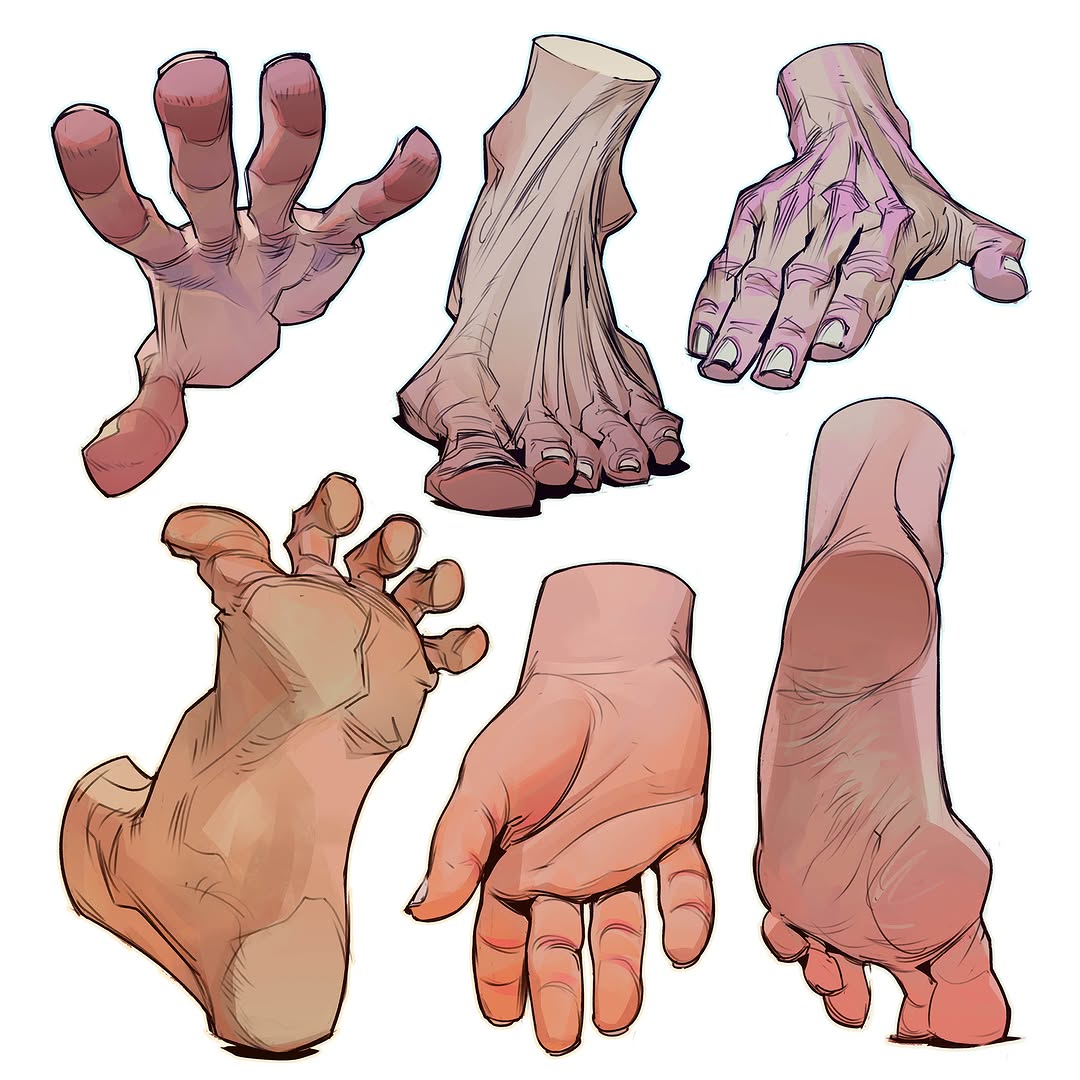
source @o.sporin
Hands and feet are two of the most challenging aspects of human anatomy to draw. The complexity of fingers, toes, and joints can often lead to disproportionate or unrealistic representations. To improve, start by breaking hands and feet into basic shapes: for example, the palm can be drawn as a rectangle, and each finger as a simple cylinder. Understanding the skeleton and how joints bend will also help bring them to life. If you want detailed guidance, “Drawing Dynamic Hands” by Burne Hogarth ([Amazon link]) provides fantastic lessons on hand anatomy and movement. Practice sketching hands in different positions and from various angles to master their proportions and anatomy.
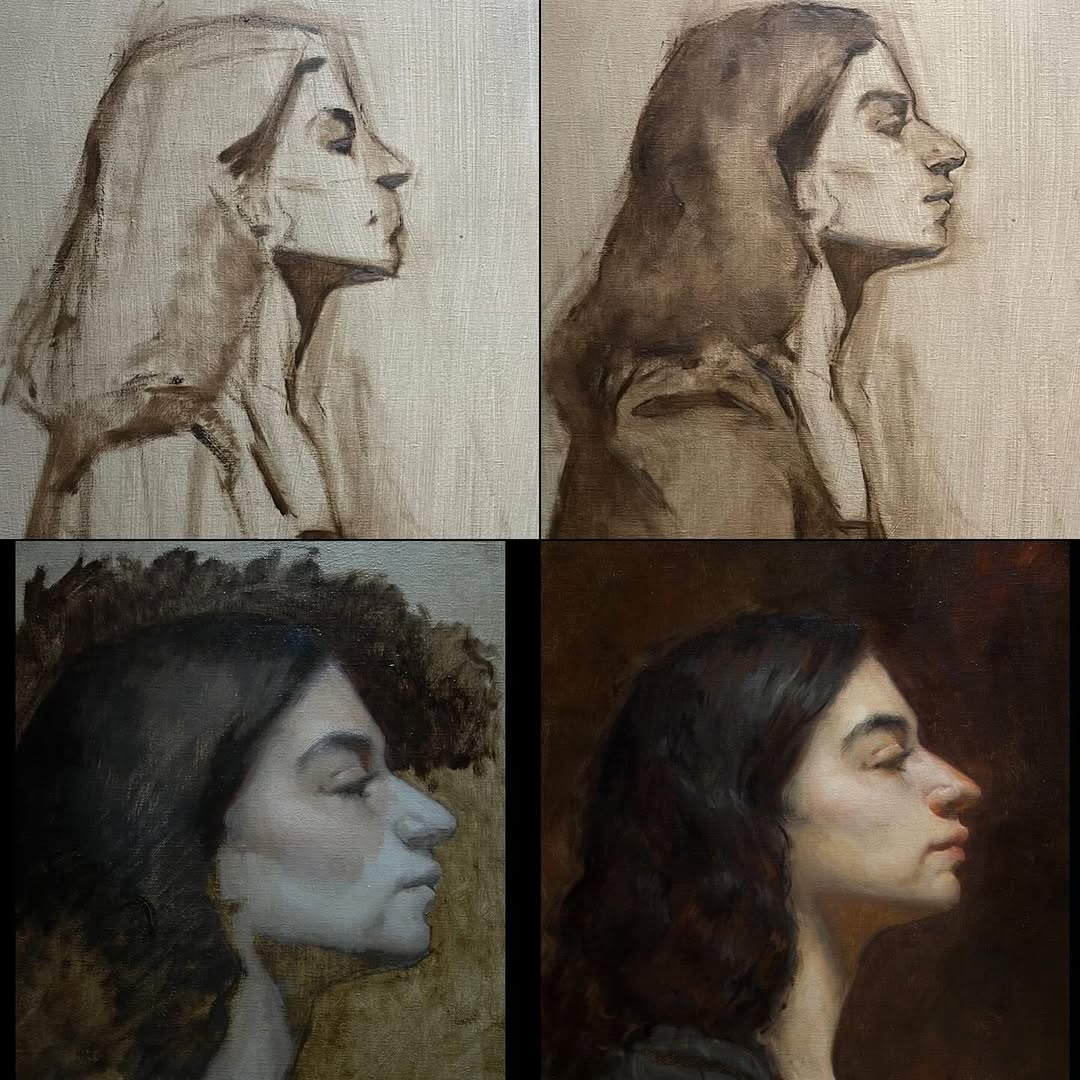
15. Use Construction Lines for Facial Features
source @bethanycrandallart
Drawing facial features can be tricky, but with the right structure, it becomes much easier. Begin by using construction lines to mark the position of the eyes, nose, mouth, and ears. This method ensures that each feature is correctly aligned with the others. For instance, place a horizontal line for the eyes halfway down the face, and then draw vertical lines for symmetry. Once the guidelines are in place, start adding in the details, adjusting the proportions as needed. Construction lines will help your faces appear more balanced and realistic. For precision, use light pencils ([Amazon link]) to sketch out the basic lines and gradually add more detail once you are happy with the layout.
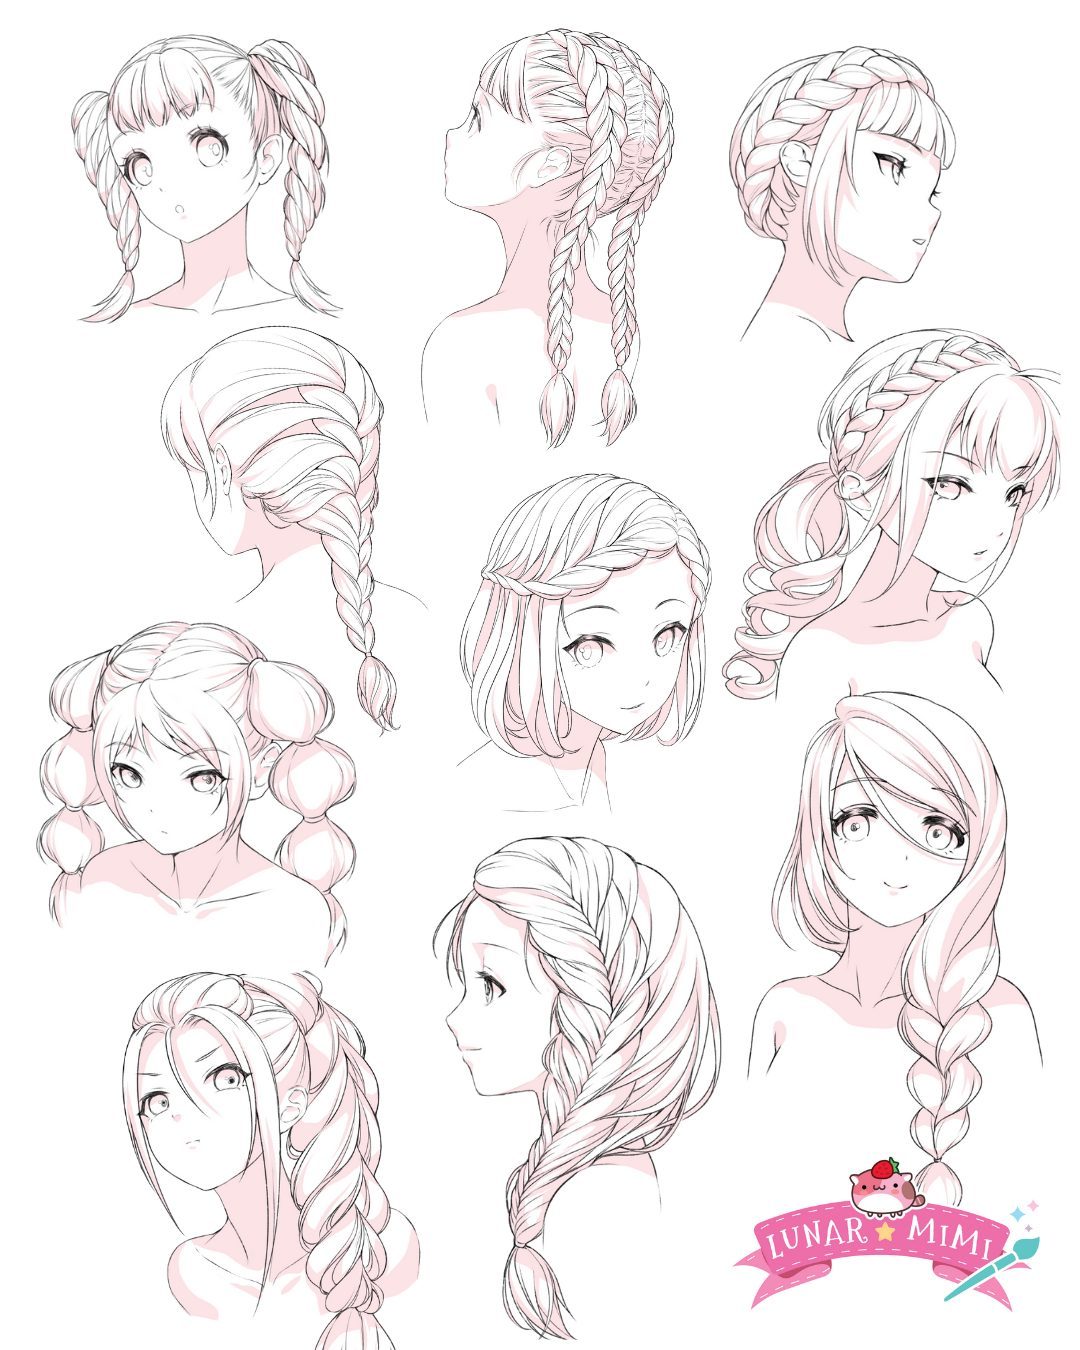
16. Explore Different Art Styles

source @gee_dee_art
Experimenting with different art styles is a great way to stretch your creativity and improve your overall drawing abilities. By studying various approaches—whether it’s realism, anime, or abstract—you can discover new techniques that work best for you. Trying new styles helps you think outside the box, experiment with different shapes and patterns, and sharpen your skills. If you love anime, for example, learn how to create exaggerated facial expressions, or if you’re into realism, practice fine details like skin texture and hair flow. As you explore these diverse styles, you’ll gain a deeper understanding of the fundamentals, allowing you to create your own unique voice as an artist. If you need inspiration, look into art books ([Amazon link]) for tutorials on different techniques and styles.
17. Work on Texture Techniques
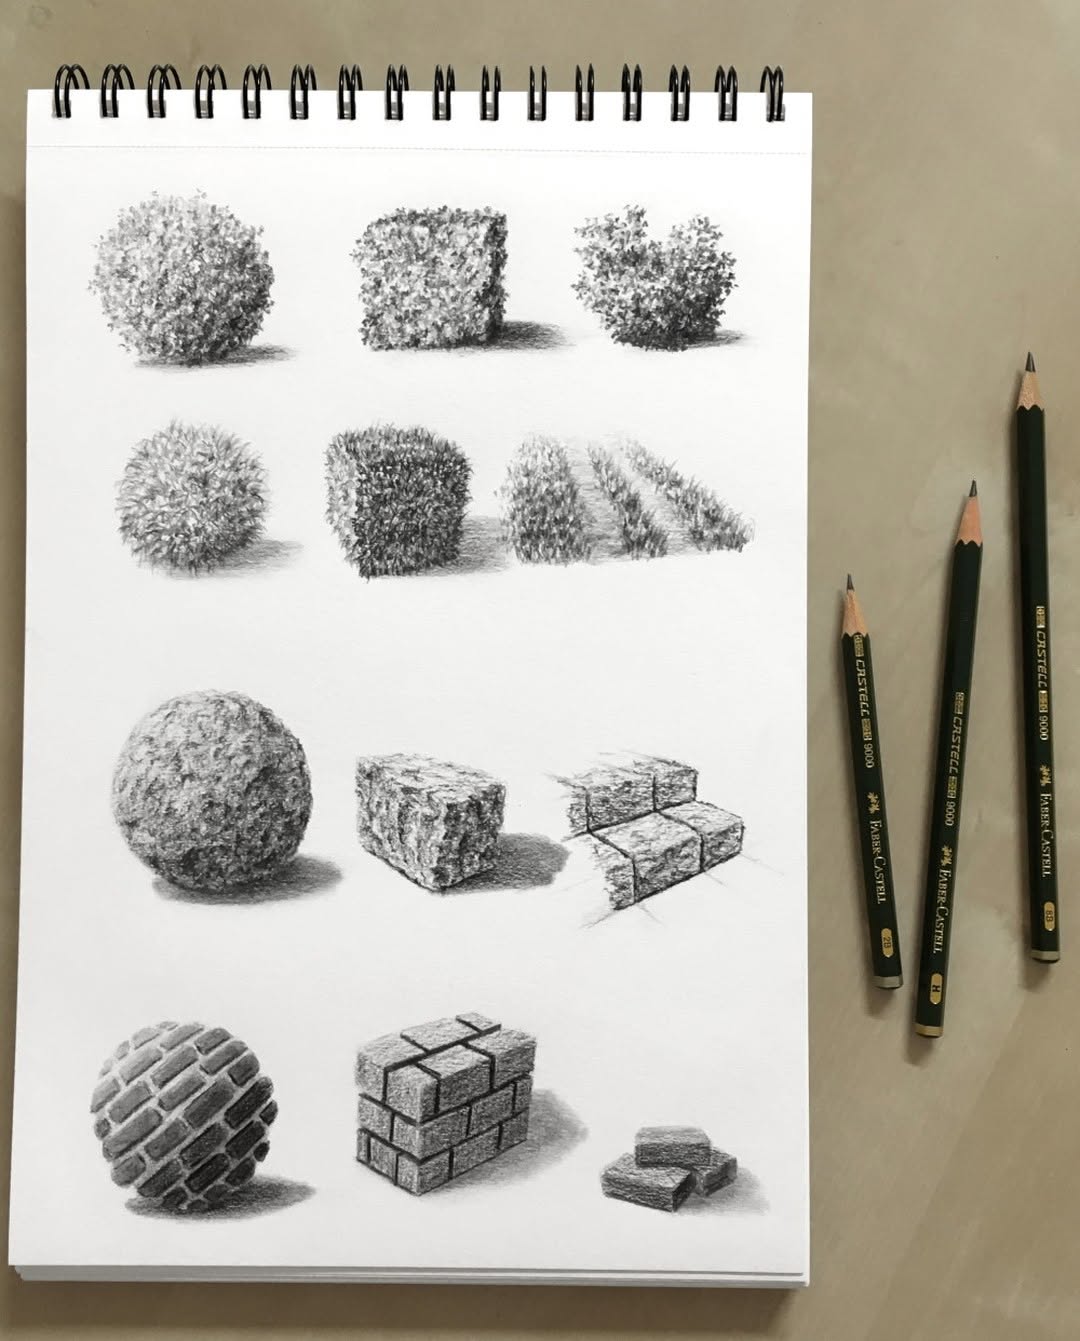
source @ran_art_blog
Texture plays a huge role in adding dimension to your drawings. It brings surfaces to life, from the softness of fabric to the roughness of stone or the fine strands of hair. Experiment with techniques such as cross-hatching, stippling, or scumbling to create different textures. You can also use blending tools, like blending stumps, to create smooth transitions in shading or to mimic the texture of soft surfaces like skin. Practice drawing textures in different objects, like fabric, hair, or wood grain, to get a feel for the different approaches. For better results, invest in high-quality shading pencils ([Amazon link]) and tools to add more detailed textures to your drawings.
18. Keep a Daily Sketching Routine
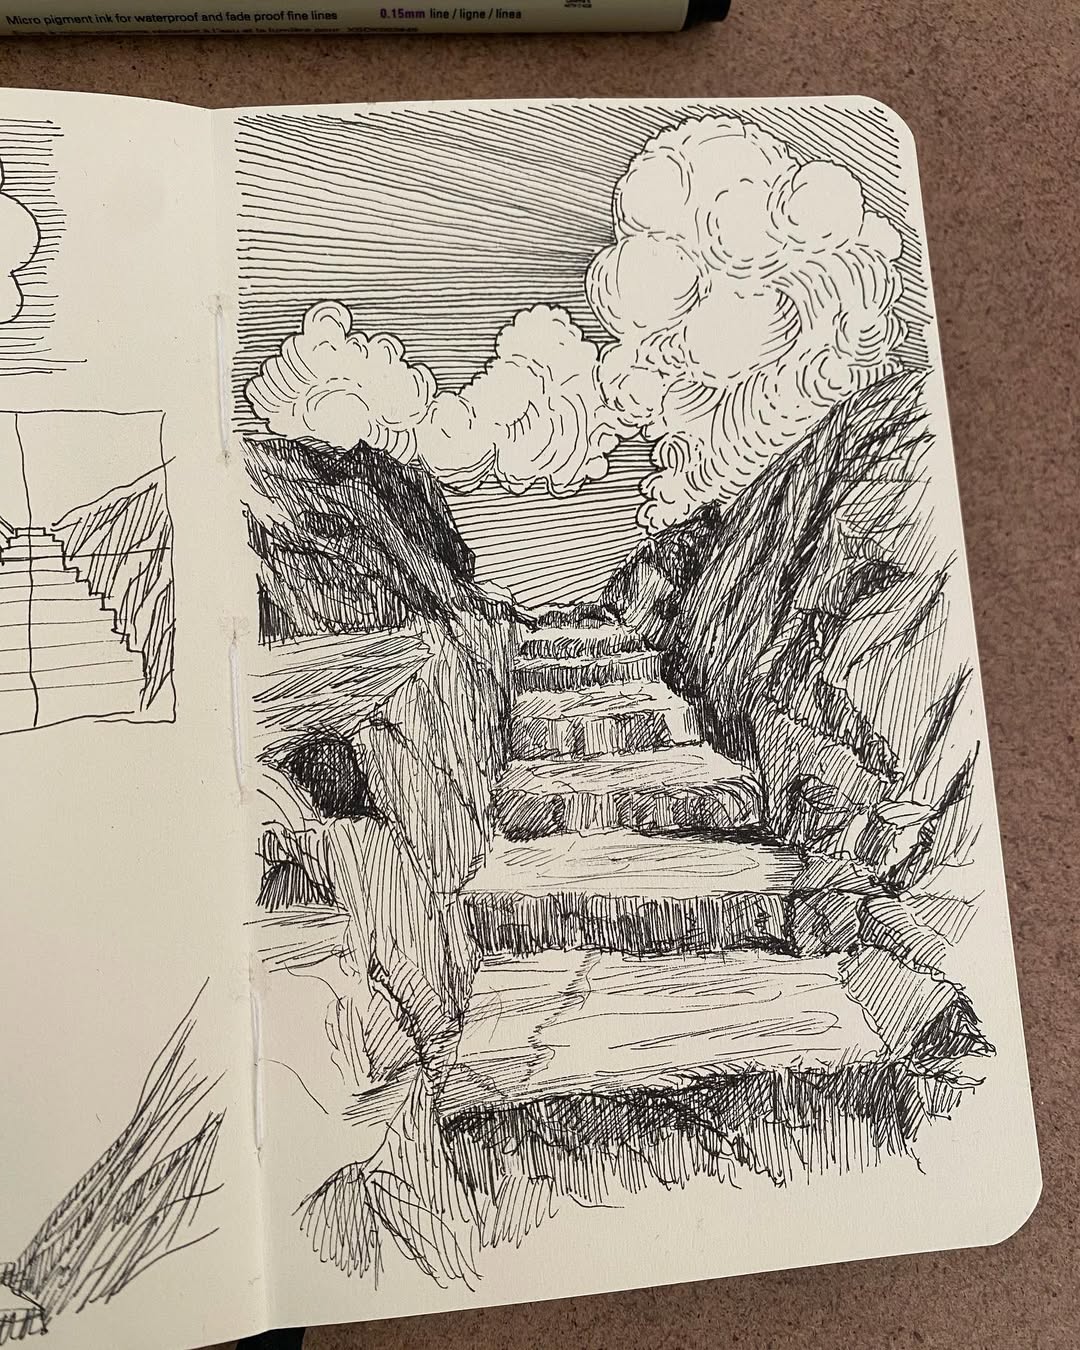
source @sketchwelat
Consistency is the key to improvement in any skill, and drawing is no exception. Even dedicating just 10-15 minutes a day to sketching can lead to noticeable improvements over time. Start small by drawing simple objects around your house, like cups or fruits, before progressing to more complex subjects. The goal isn’t to create perfect art every time but to improve your technique through regular practice. Keep a sketchbook ([Amazon link]) with you at all times so you can sketch on the go. You’ll be surprised at how much your skills can develop with a little effort every day.
19. Don’t Be Afraid to Make Mistakes
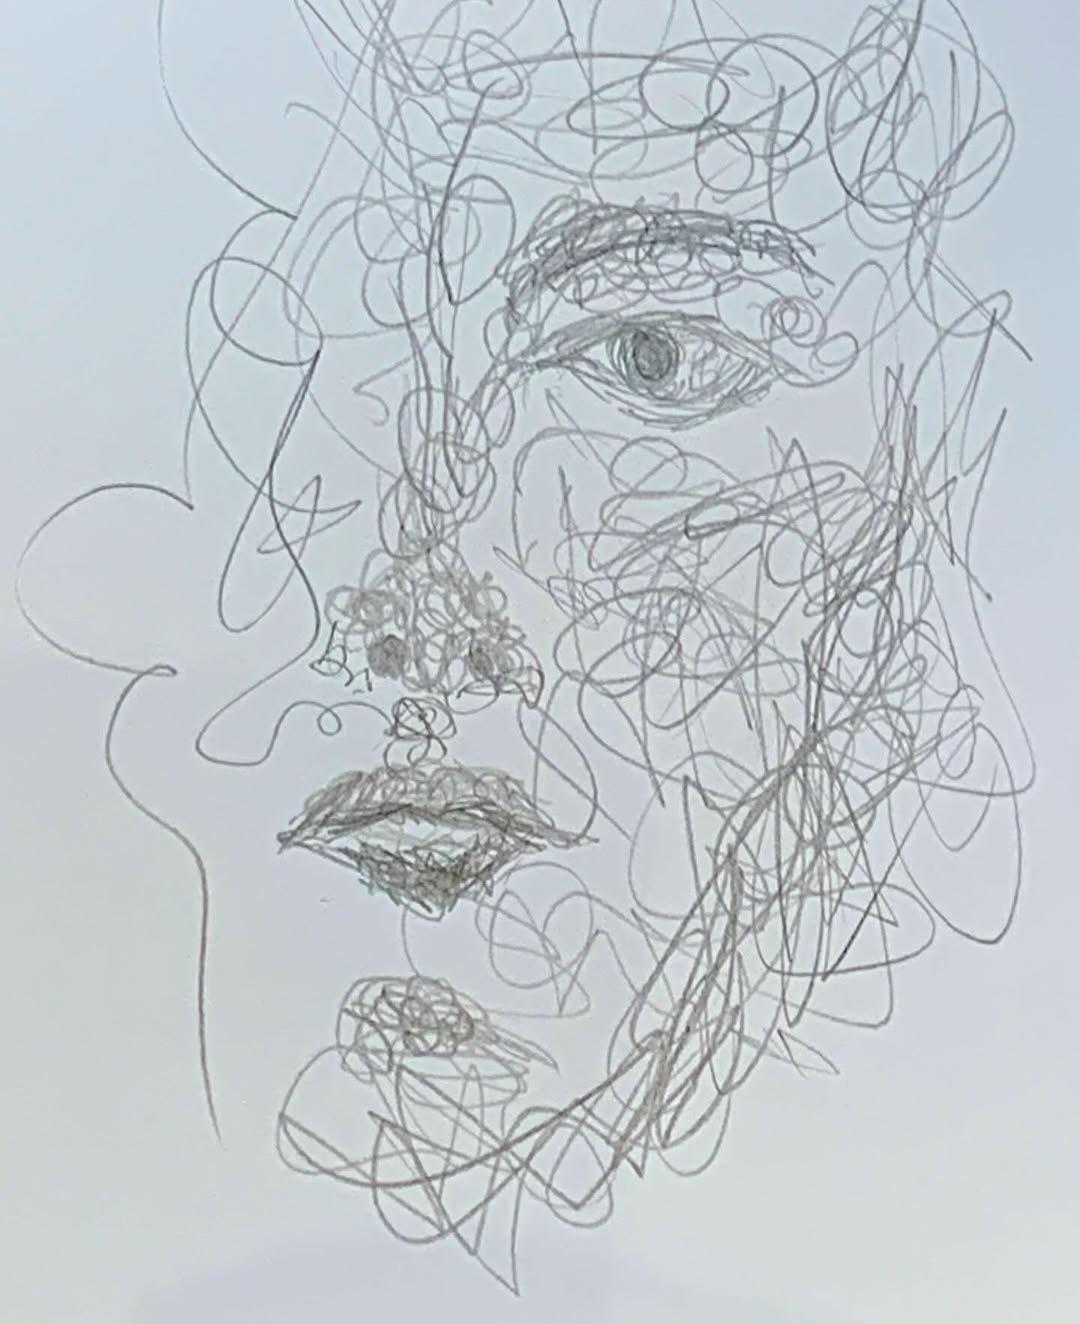
source @lunarmimi
Mistakes are an inevitable part of the creative process, and it’s important to embrace them rather than fear them. Every error is an opportunity to learn and improve. Instead of getting frustrated when something doesn’t turn out right, step back and analyze what went wrong. Whether it’s proportions, shading, or line quality, figure out how to correct it next time. Over time, these lessons will help you refine your techniques and develop your unique artistic style. Remember, even the most successful artists make mistakes—they just keep going! Keep a positive mindset ([Amazon link]) and enjoy the journey of growth.